Schiller MS-12 ECG System with Integration Installation Guide
Important information about the licensing required for this software
This guide will show you how to install and configure the Intelligent Integration Interface for the Schiller MS-12 ECG Machine. This installation will require two separate license keys. The first is for the Intelligent Integration Interface (I3) this key will begin with NIEF. If you haven't already done so, you can request the keys for this from the Numed Installation Guides and Request Licenses. The second is for CS-104, which can only be requested after the software has been installed. We require information from the software to issue this; please see step 10 for full details.

For the ECG machine to work correctly all steps in this guide need to be followed.
Installation of the Intelligent Integration Interface (I3)
1.
Download and extract https://downloads.numed.co.uk/software/i3/I3installer.zip
2. Run I3installer.msi, then click Next
3. Click Install
4.
Click
Finish
Installation of CS-104
5. Download and run https://downloads.numed.co.uk/software/schiller/CS-104installer.msi - please note that this installer has
no buttons to press and will just close automatically once done.
6. Run SetPermissions_All v1.0.5.bat,
press any key once finished
Requesting the License for CS-104
7. Open the CS-104 software 
8. Confirm the language and region by
clicking the save icon at the bottom right of the screen
9. Make a note of the Host ID
10. Click CS-104 License Request and fill out the form. We require all of the requested information to issue you the license key. Once sent we will issue a license. Please note that the process of issuing license keys is not an automated process and there may be a delay in receiving the
issued license key.
Configuring CS-104
11. Once the license has been sent to
you, copy and paste it into the field (either activation key or license key) indicated on the email, you should then get
a tick to the right of the license key, then click save.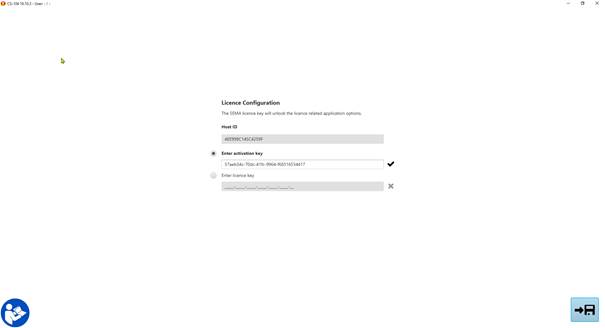
12. Under Device ID it should display
the PC Name (which is frequently the same as the asset tag).
13. It will then ask you to sign into
the software. Username = “default” and Password = “system”. This user will
allow software configuration but will not allow the acquisition of ECGs.
14. Plug the ECG machine, and the icon will appear in
the top right corner once the device is recognized 
15. Click Settings 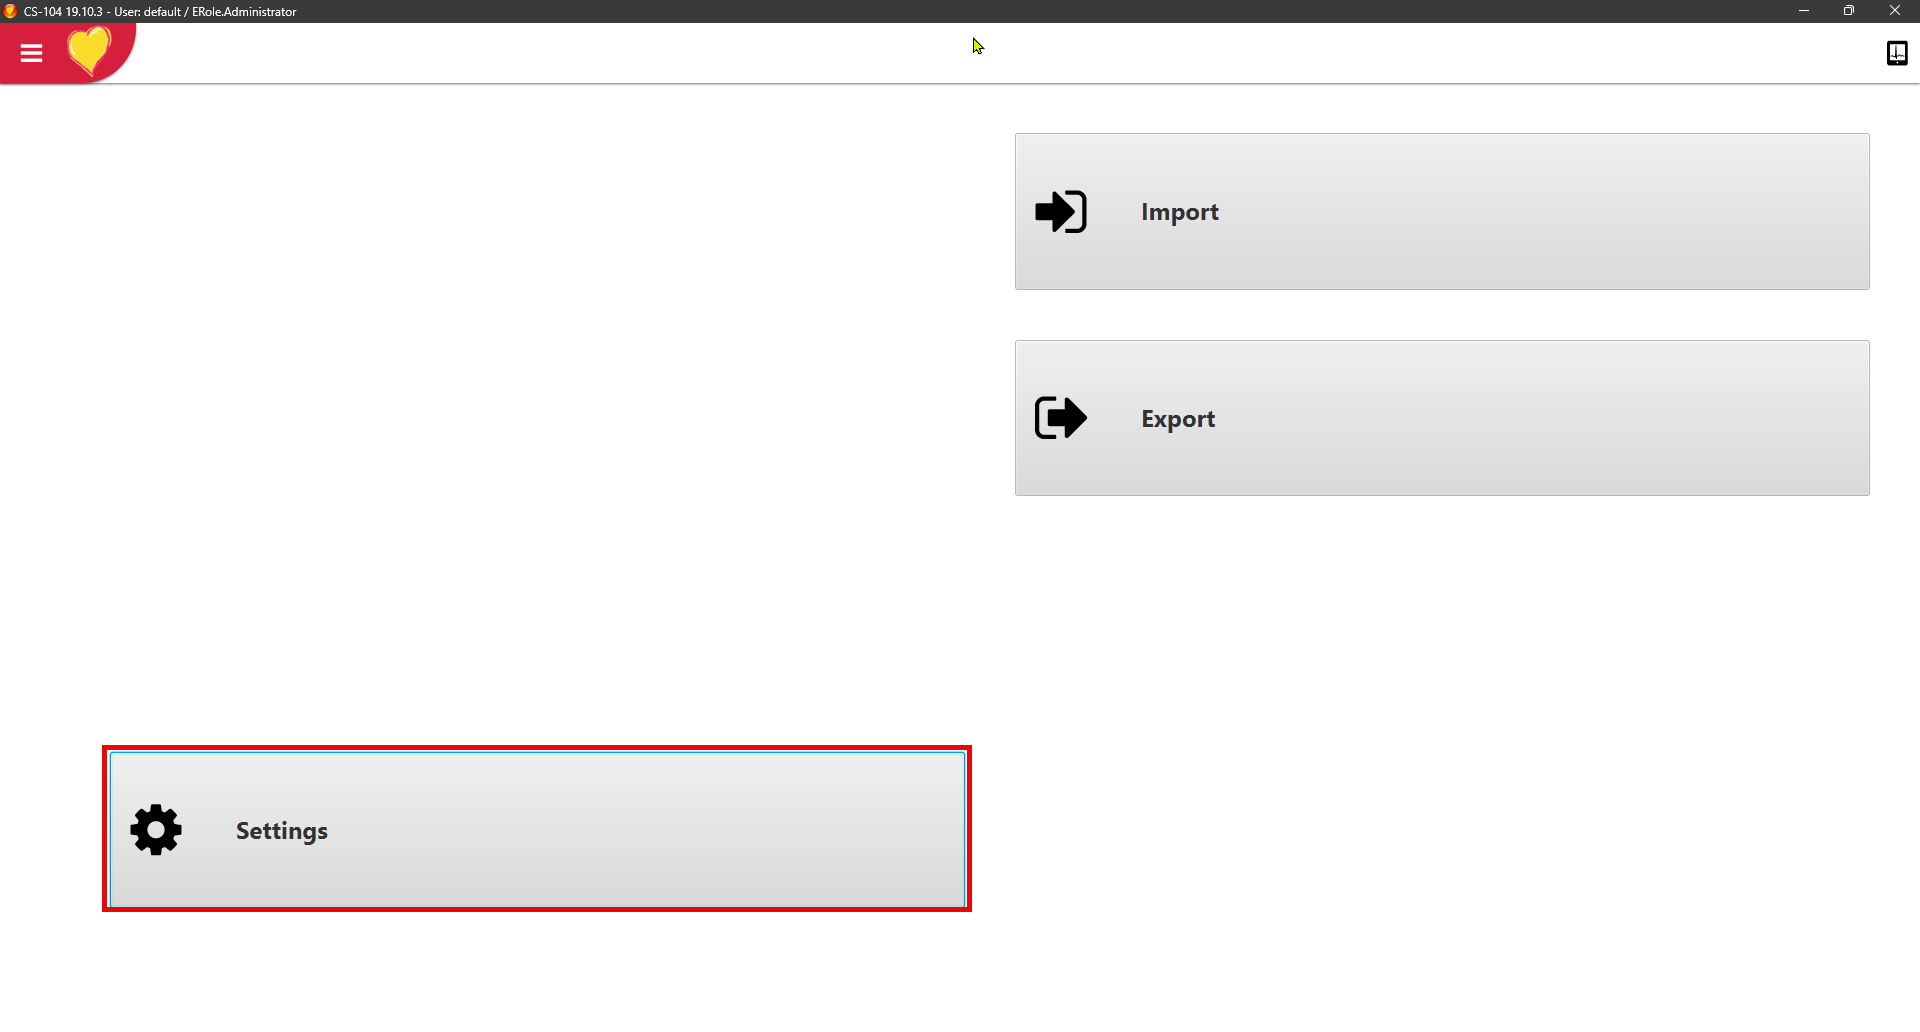
16. Select Layout and then change the
Screen size to Maximized 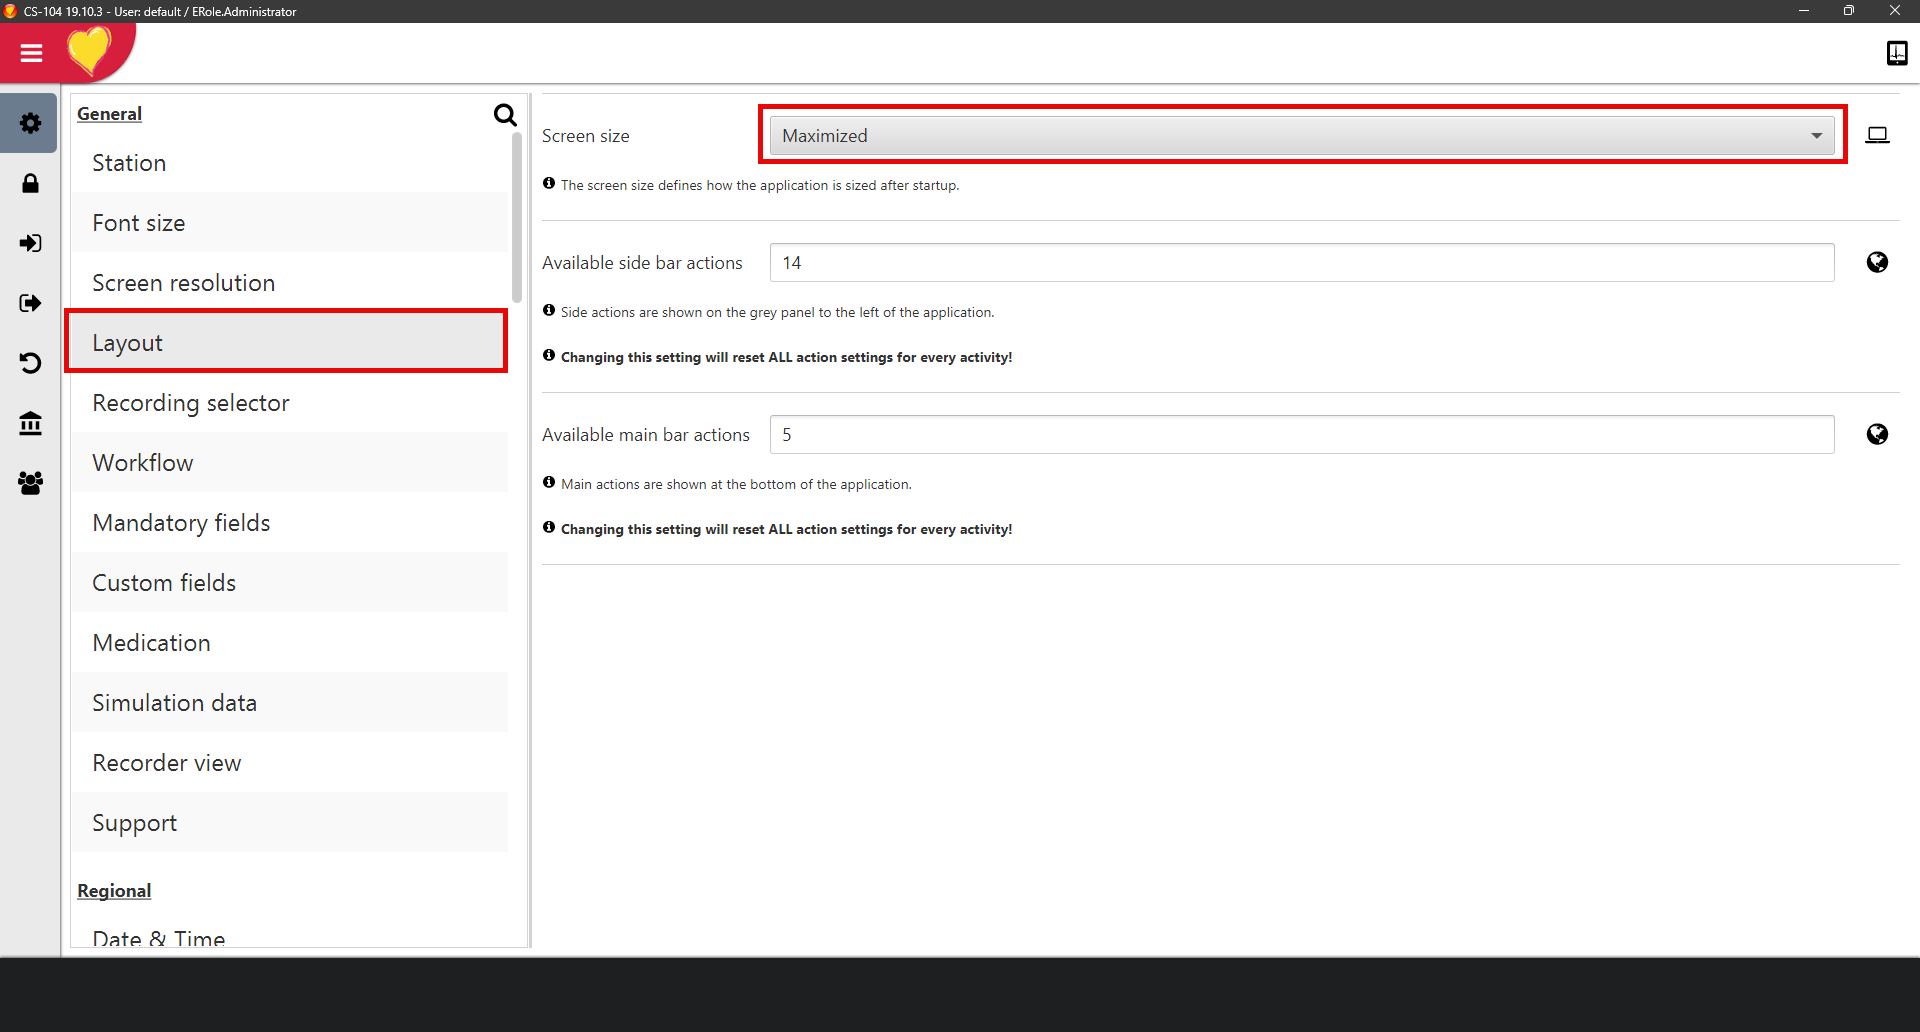
17. At the bottom left hand side is a
people icon, click this to go into the user config area 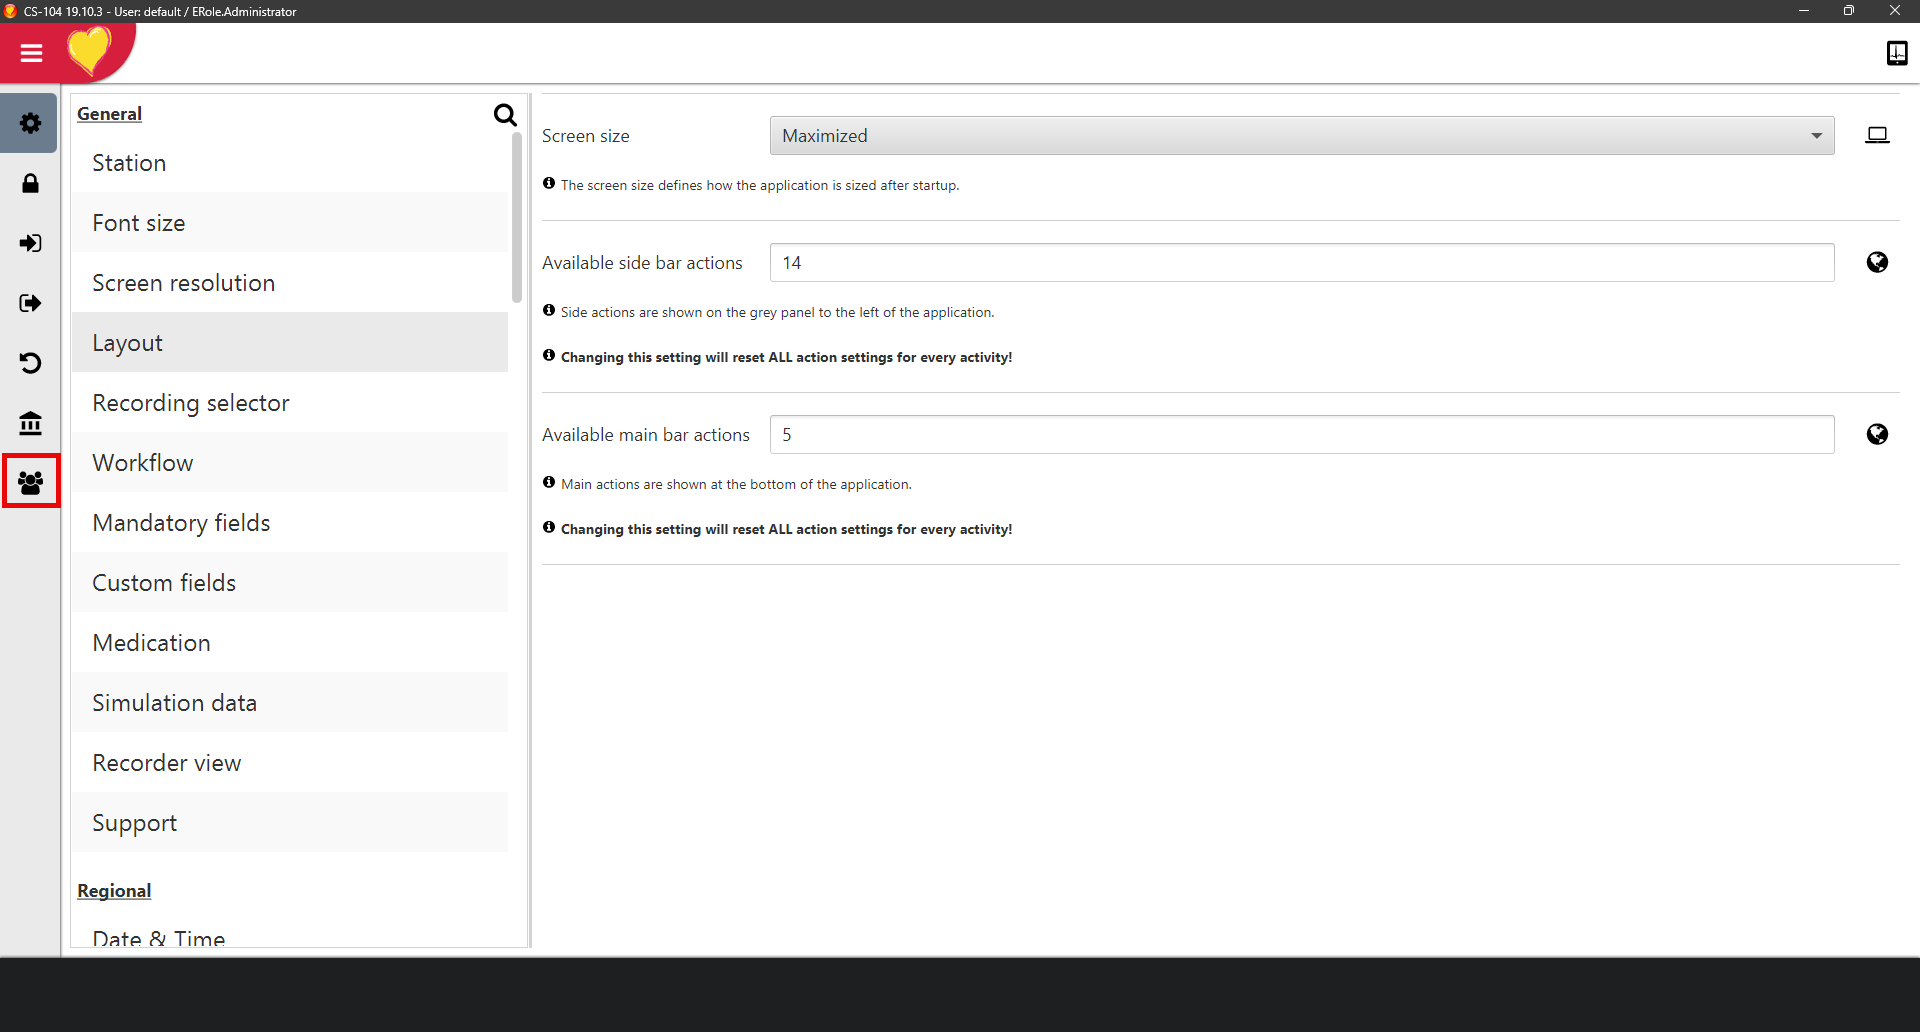
18. Click the plus symbol at the bottom
of the Users box 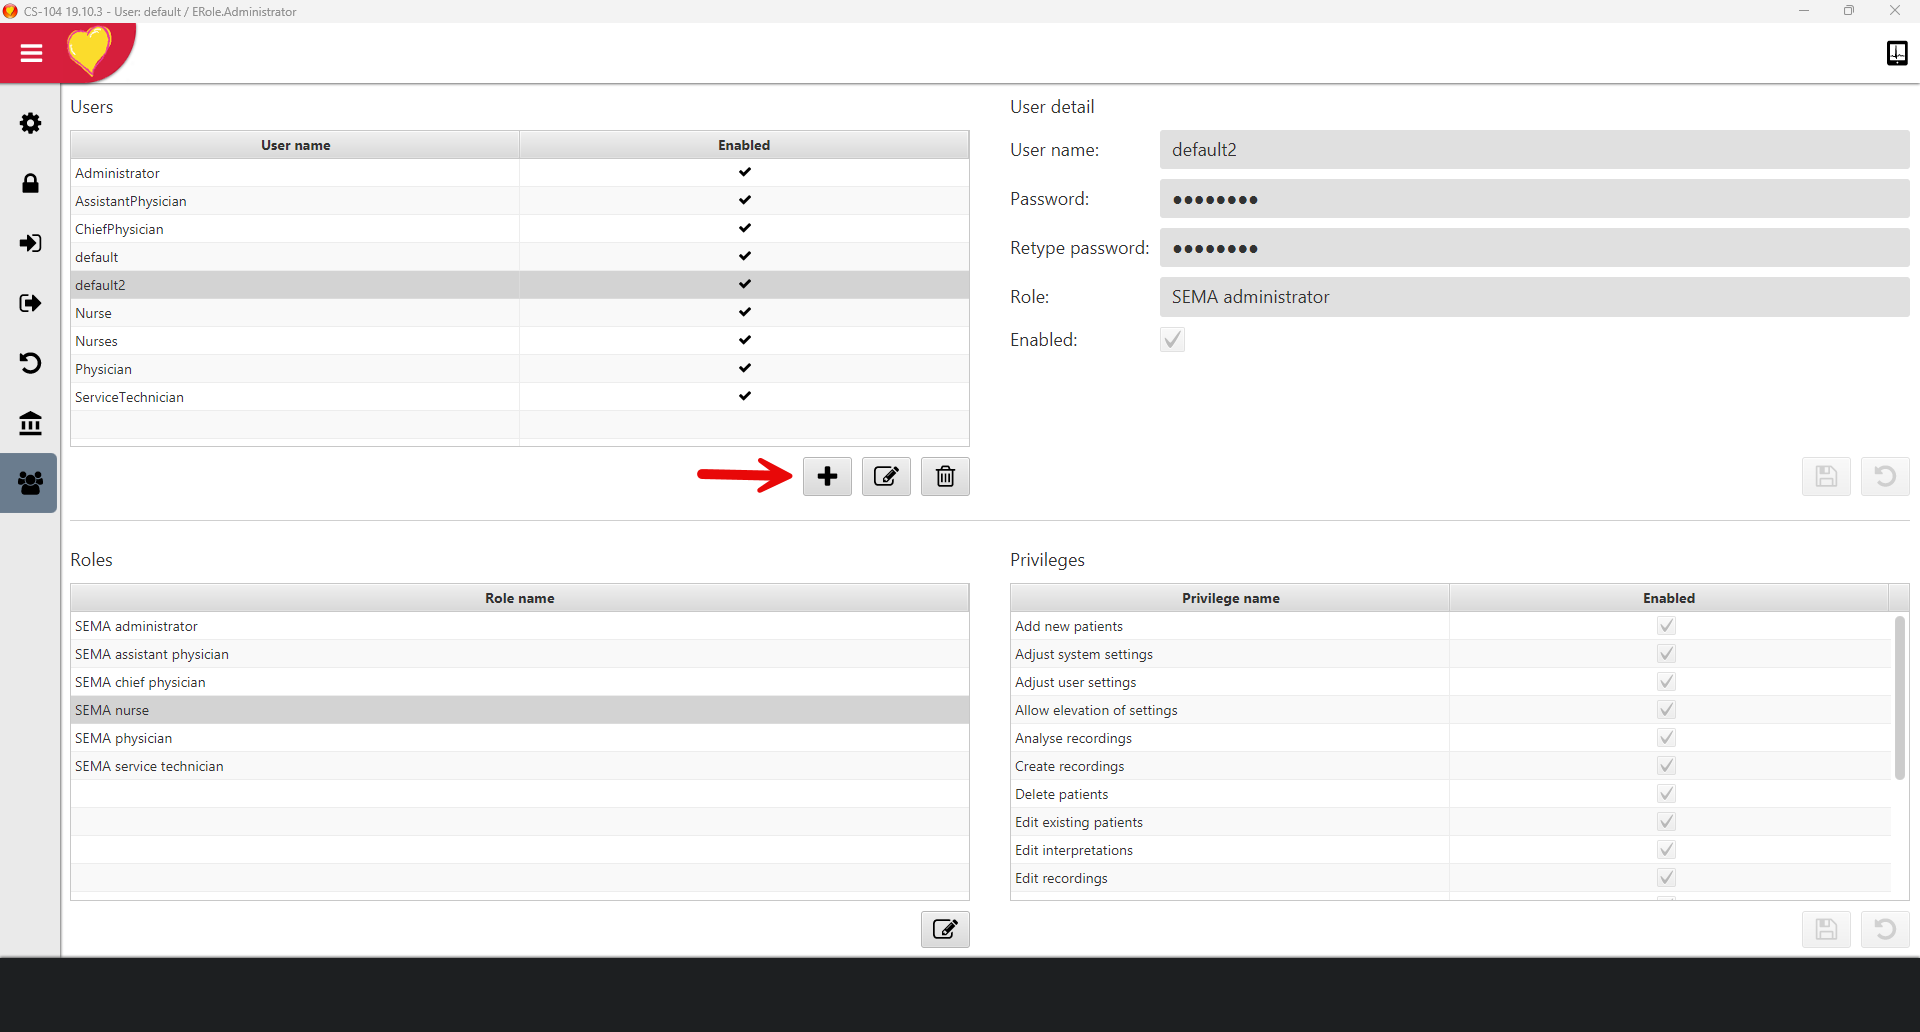
19. Create a new user for the
integration when taking ECGs, remember to click the save symbol
a. We recommend the following.
i. User name = Numed-I3
ii. Password = Numed1
iii. Role = SEMA Nurse (please note that
the rest of the configuration is based on this setting 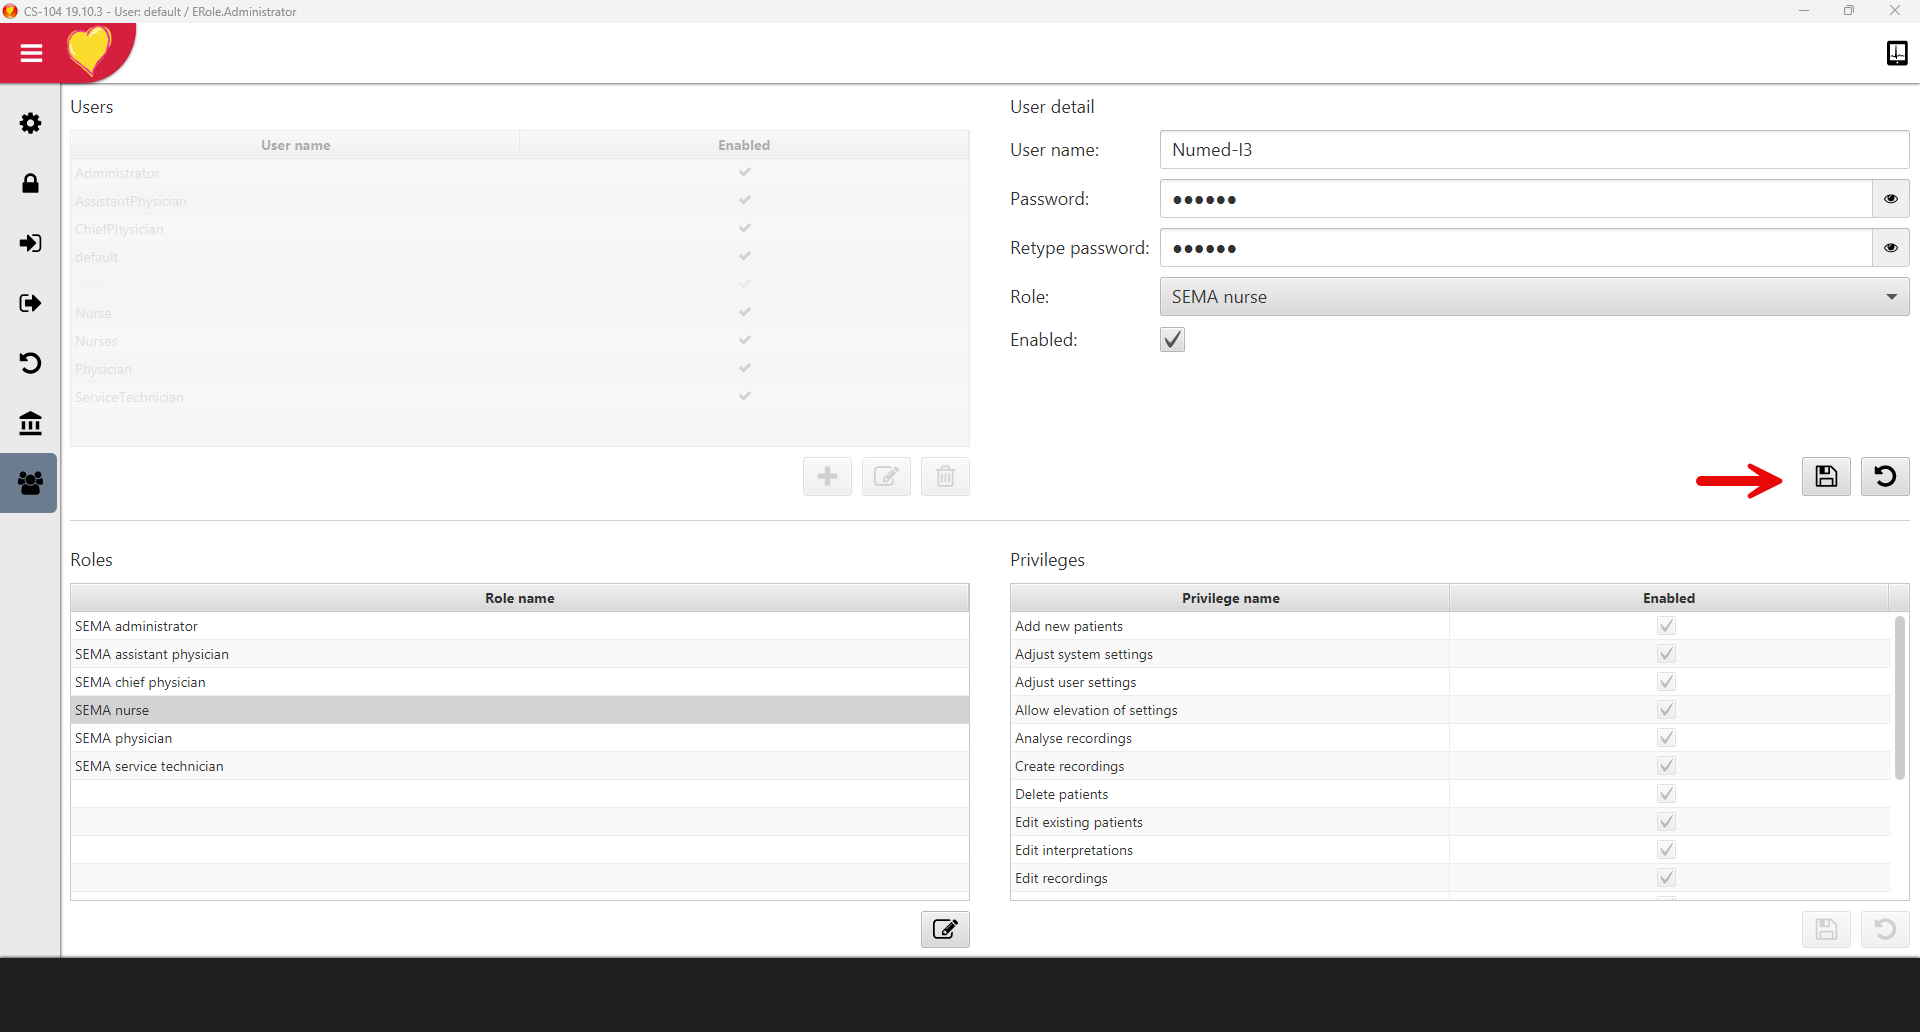
20. In Roles select SEMA nurse and click
the edit button at the bottom. 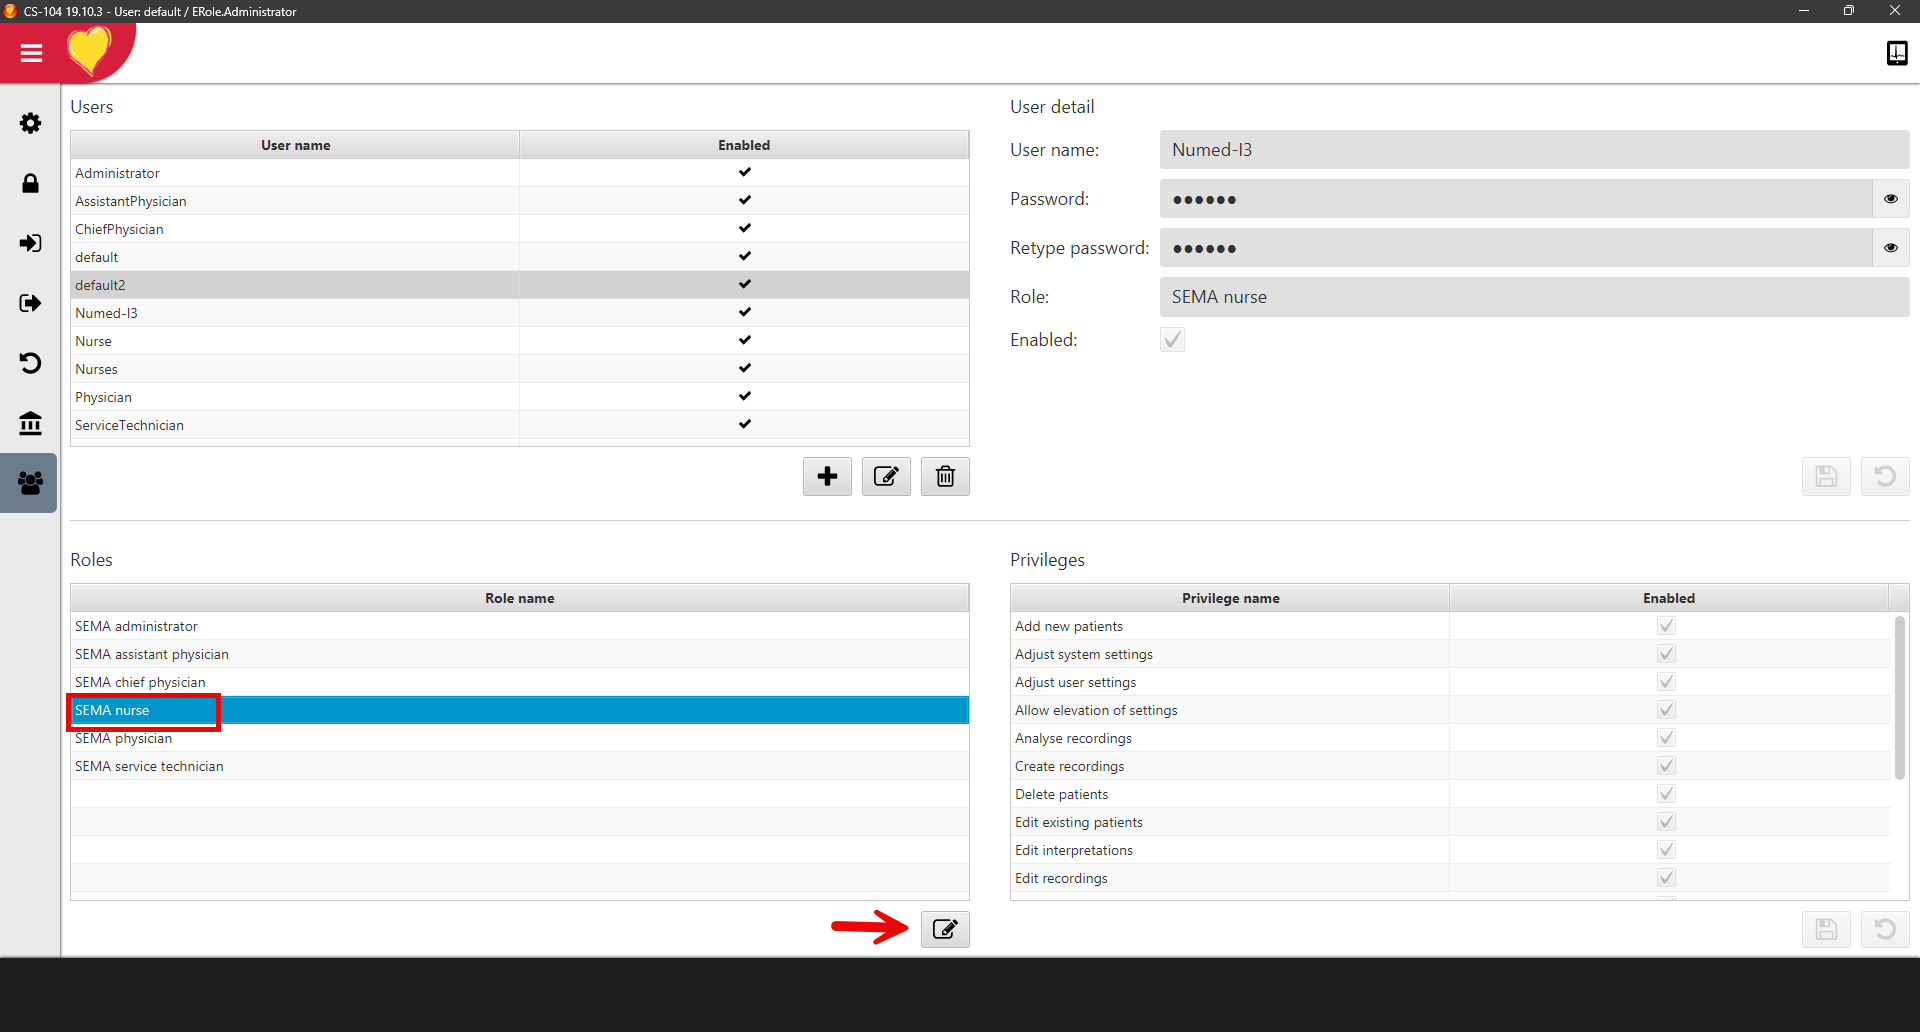
21. Under Prvileges ensure that all
options are ticked, then click the Save icon. 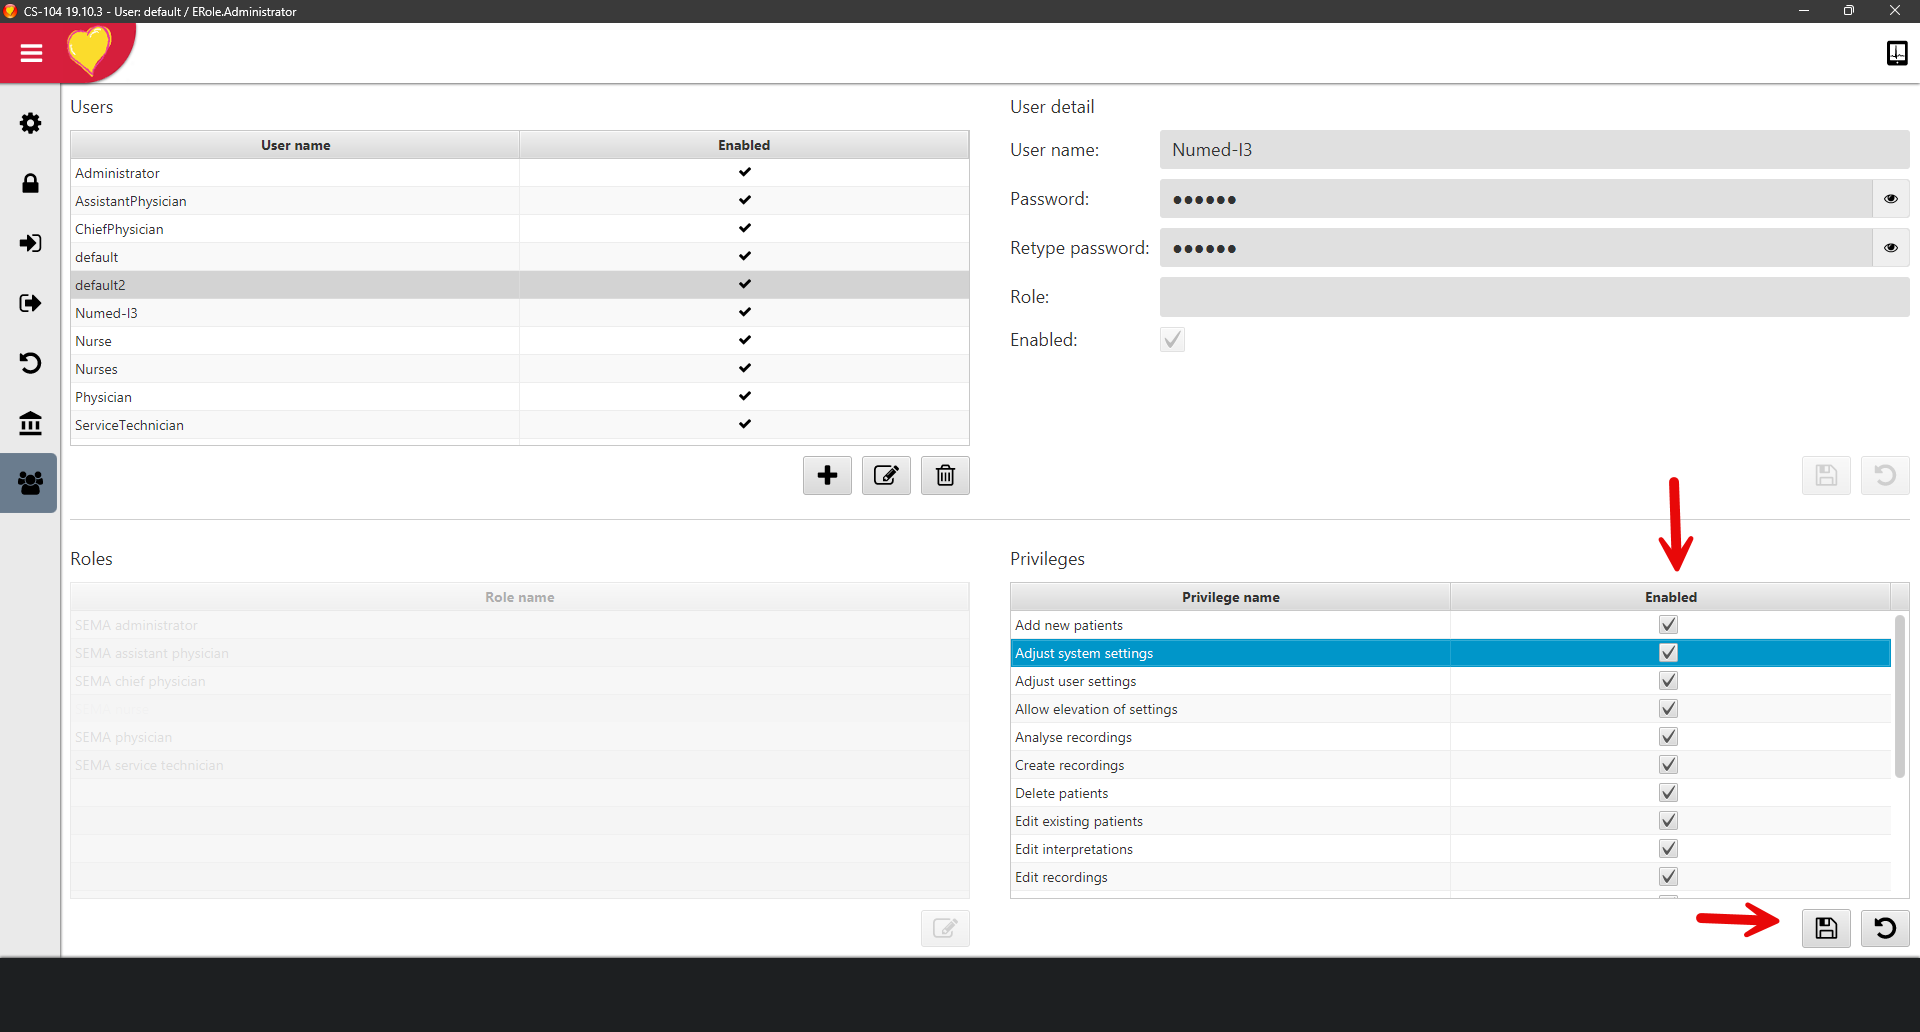
22. Close the software.
23. Relaunch CS-104 and login with the
new Numed-I3 account created in step 19.
24. Click Settings 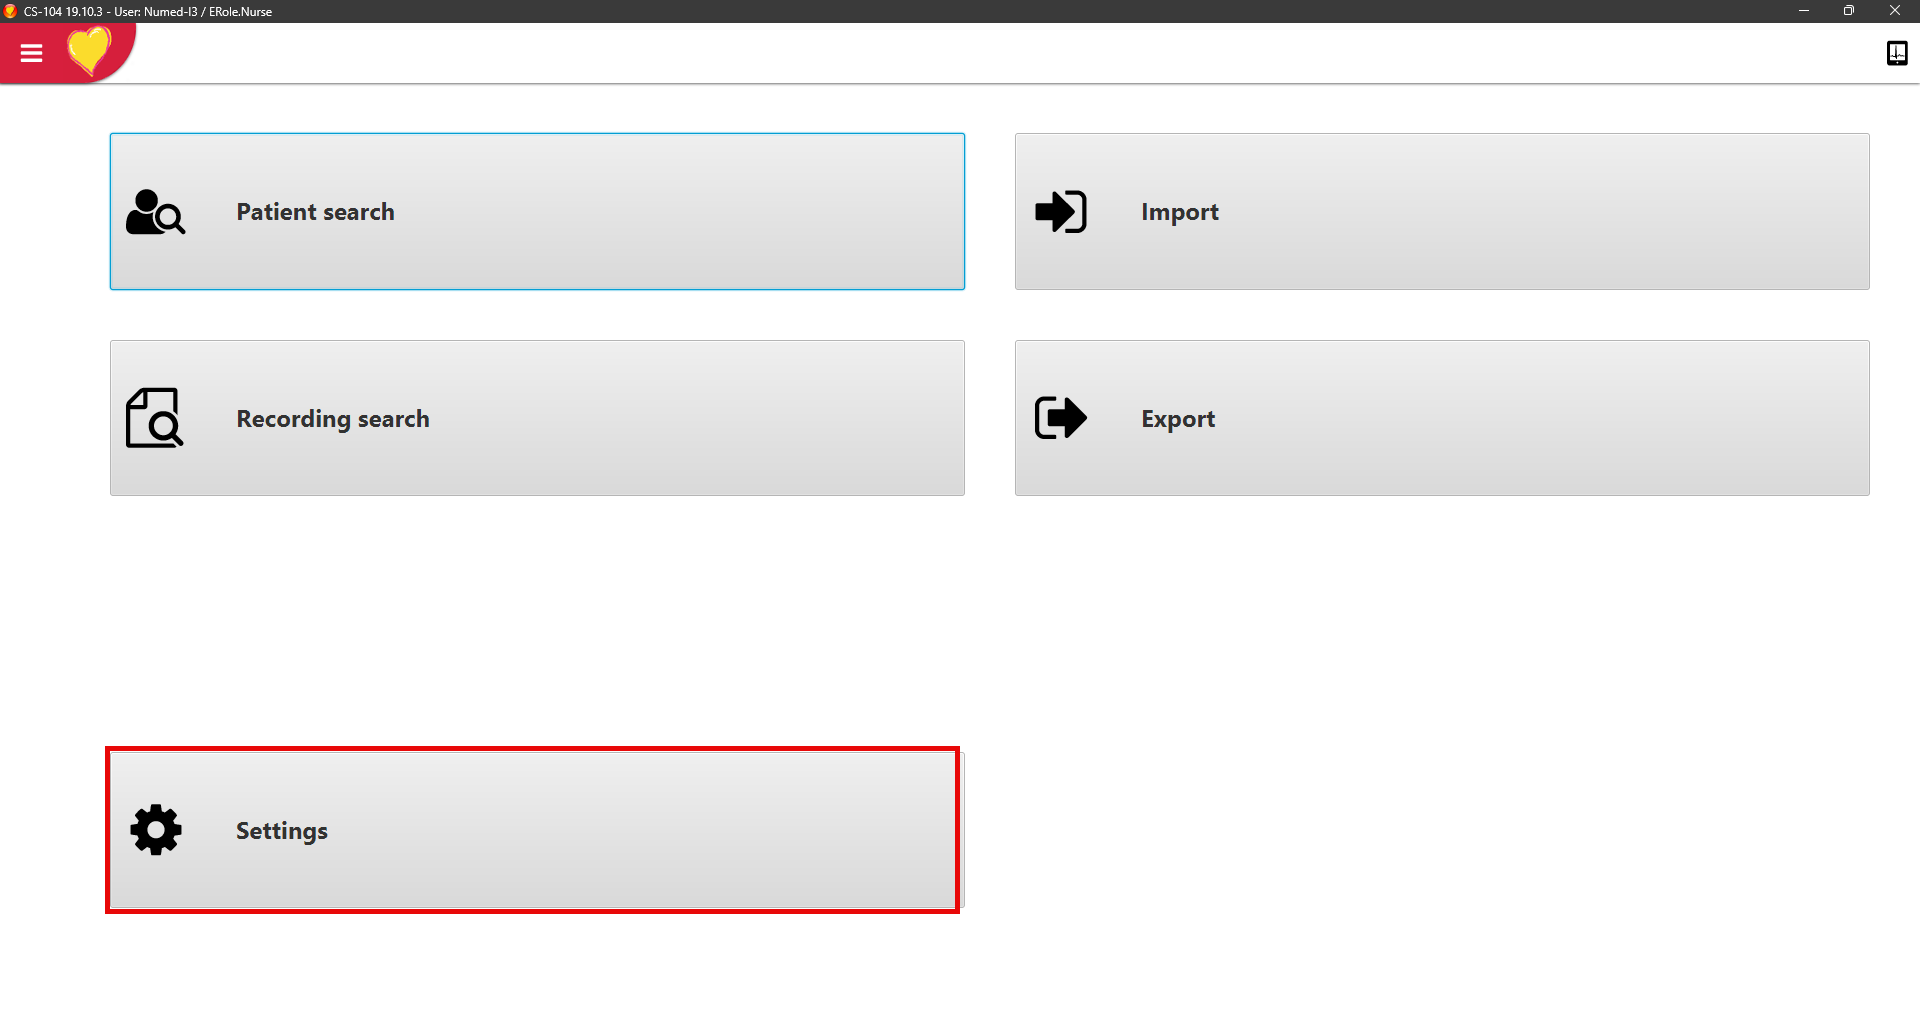
25. Go to Recorder view, select light
and then configure as per below 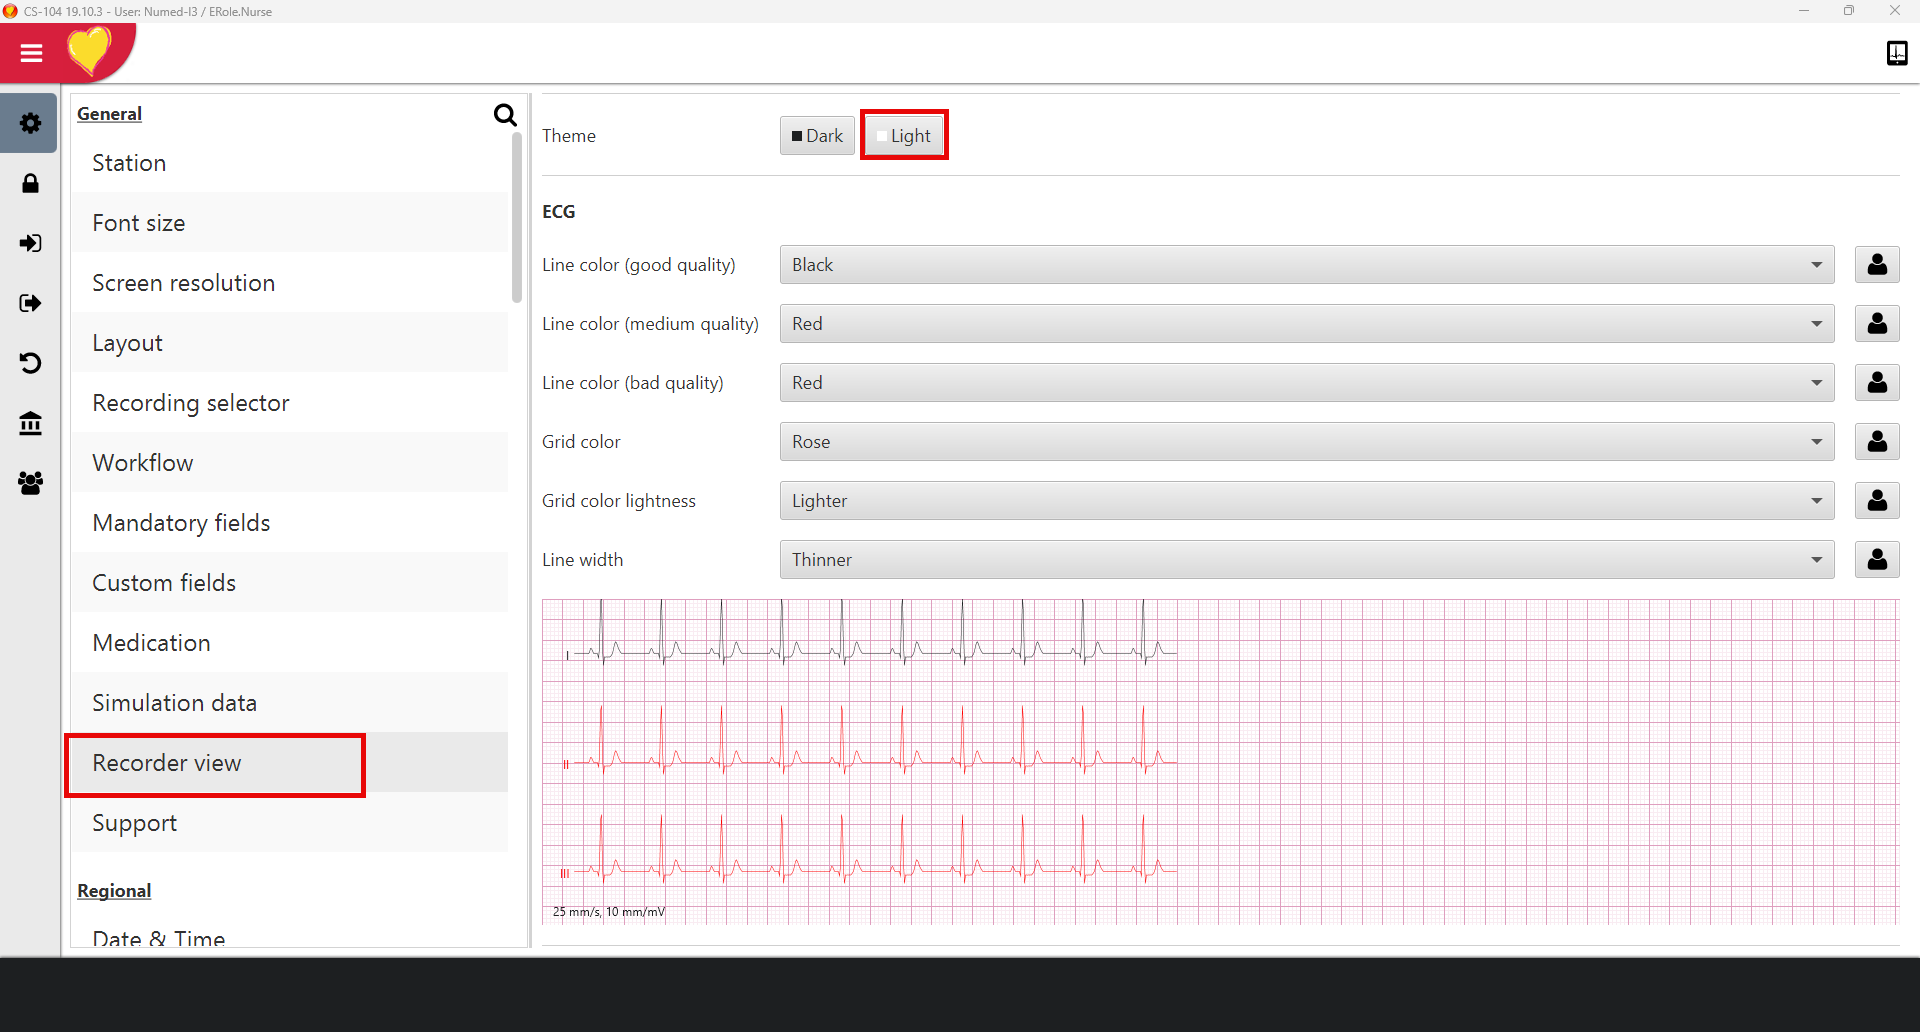
26. Once configured, click the person
icon to the right of each setting
a. Please note that when present, when configuring, you must always click this icon if you modify that setting.
27. Scroll down the settings to Import 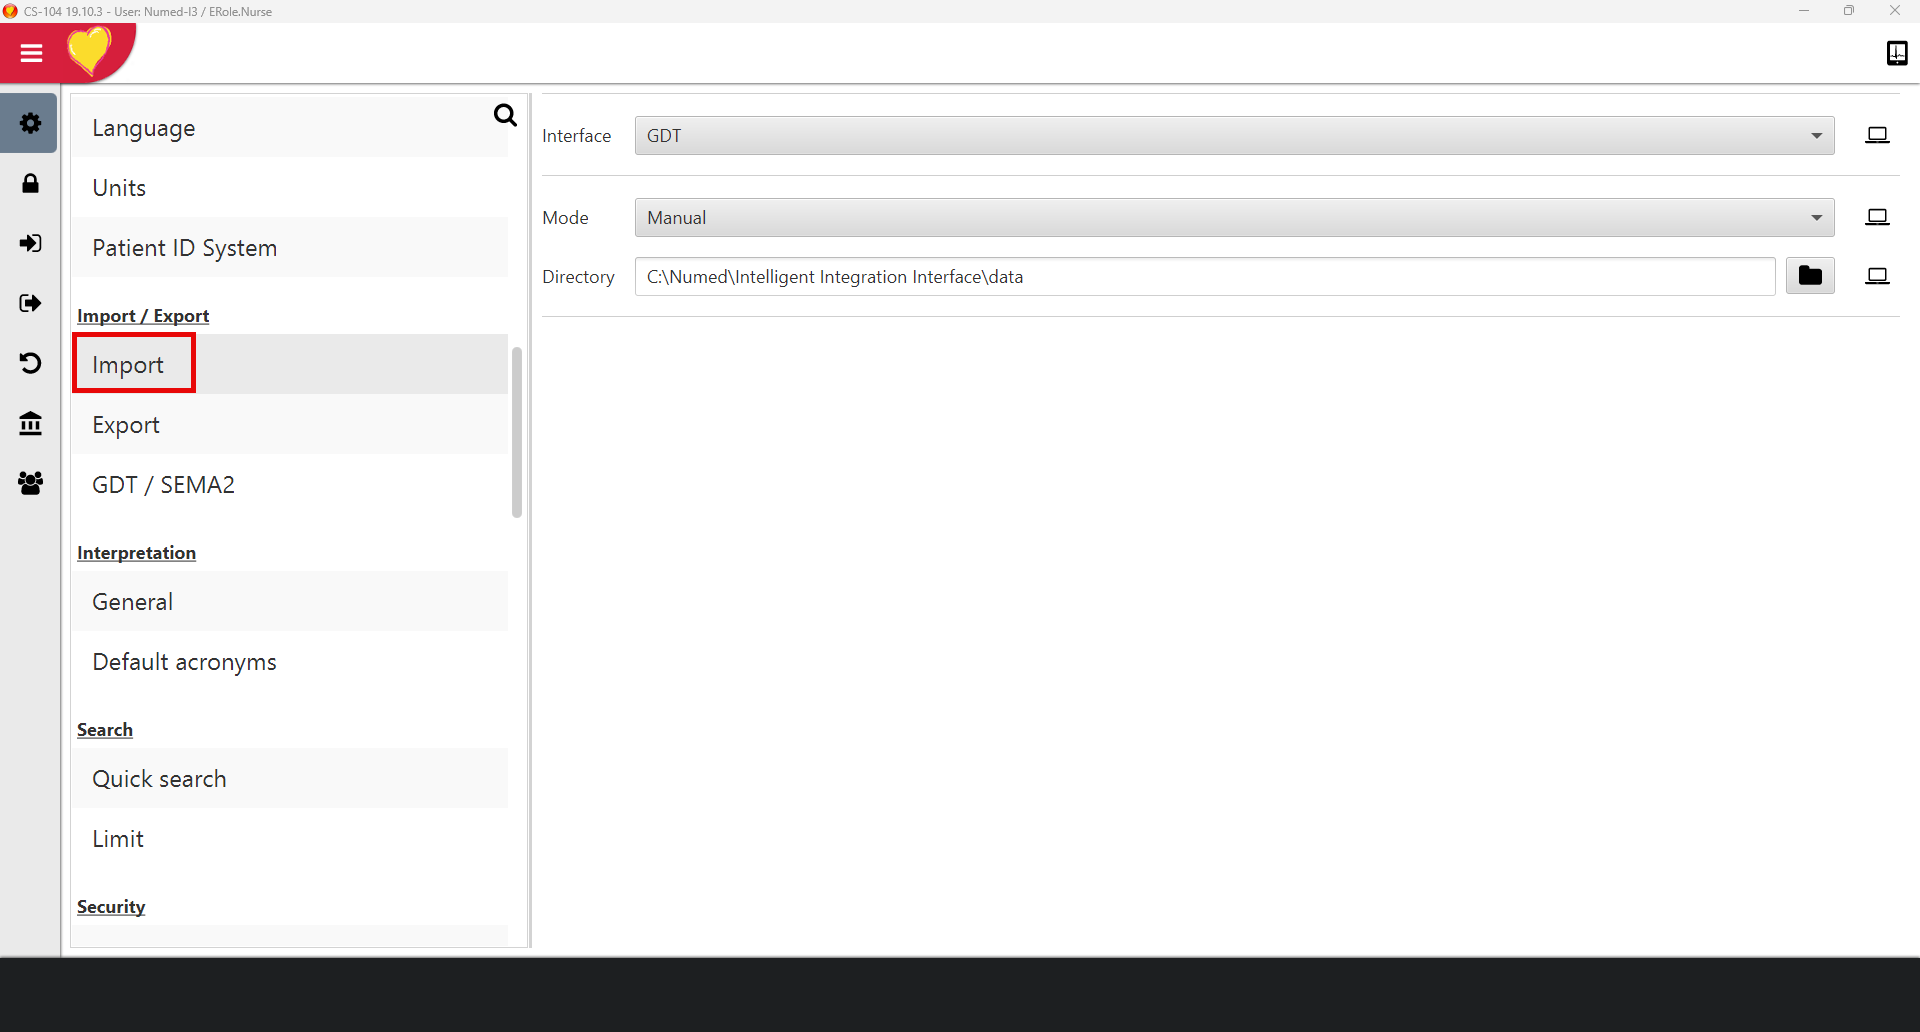
The directory file path is C:\Numed\Intelligent Integration Interface\data
28. Export 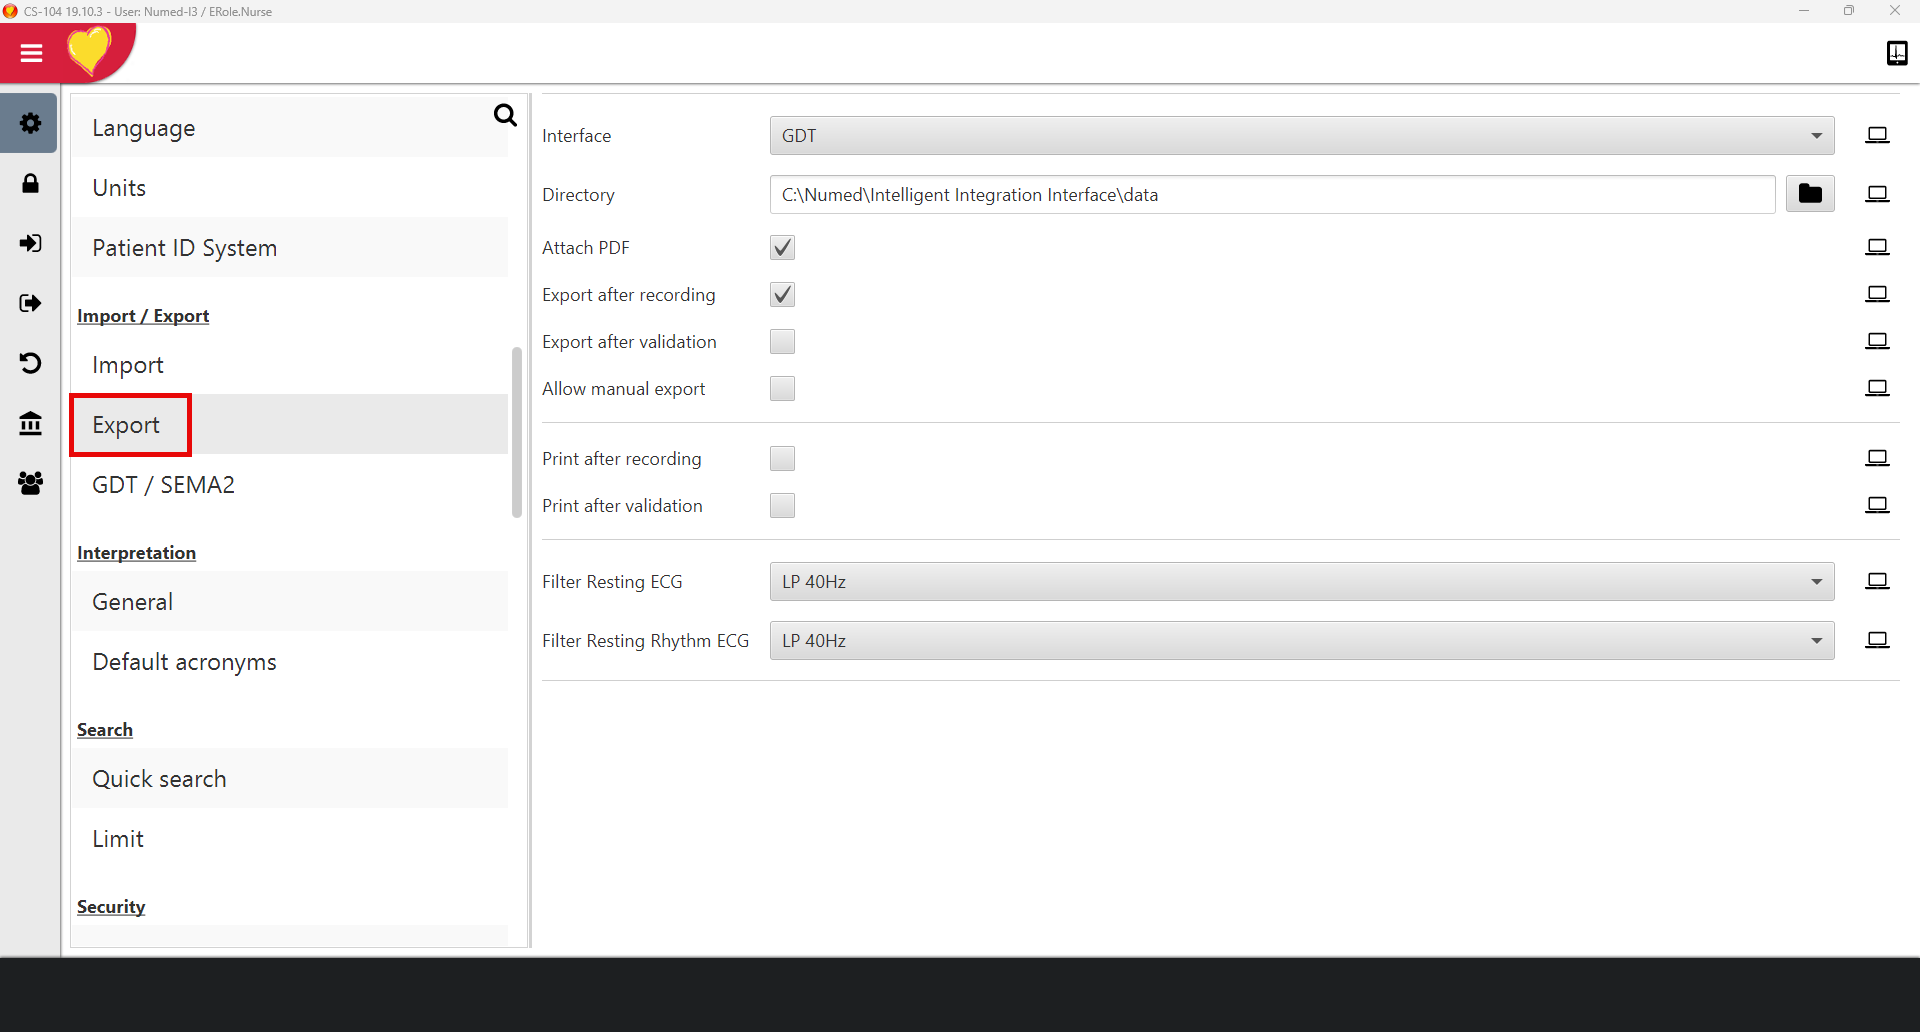
The directory file path is C:\Numed\Intelligent Integration Interface\data
29. Import / Export - GDT / SEMA2 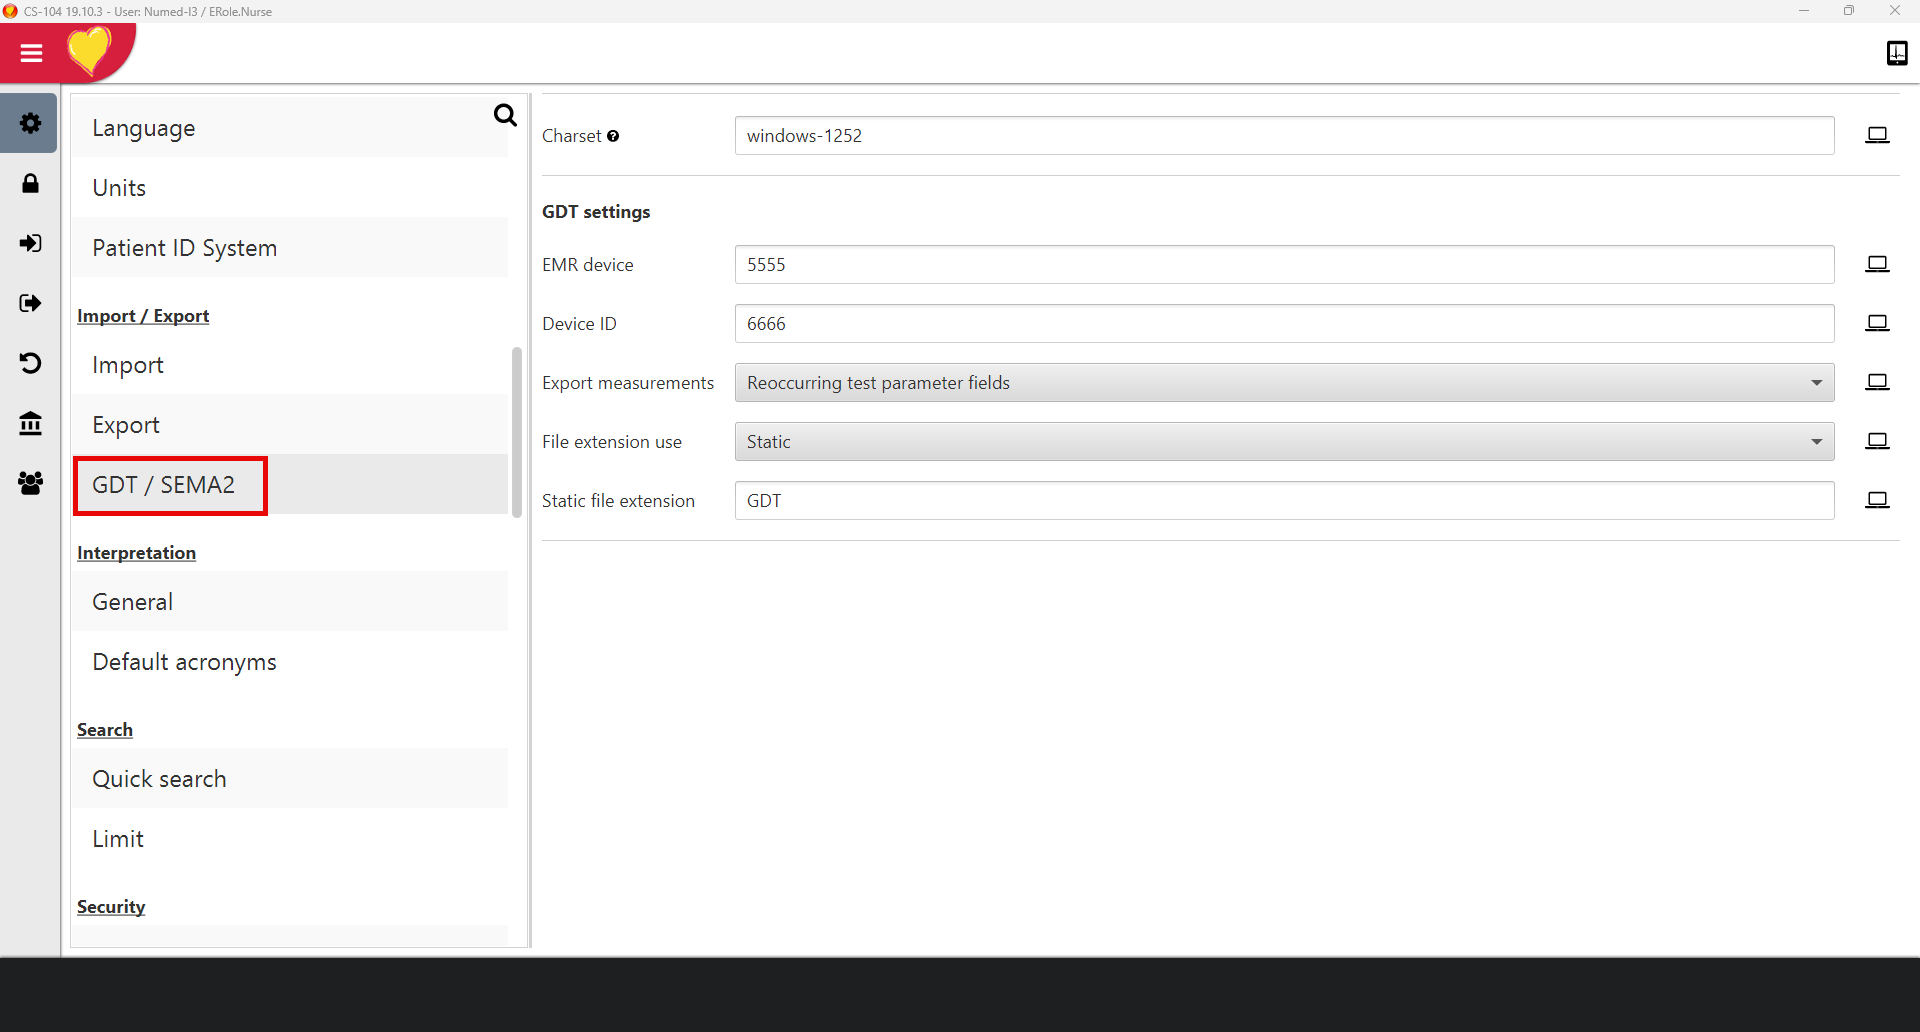
30. Security - Lock 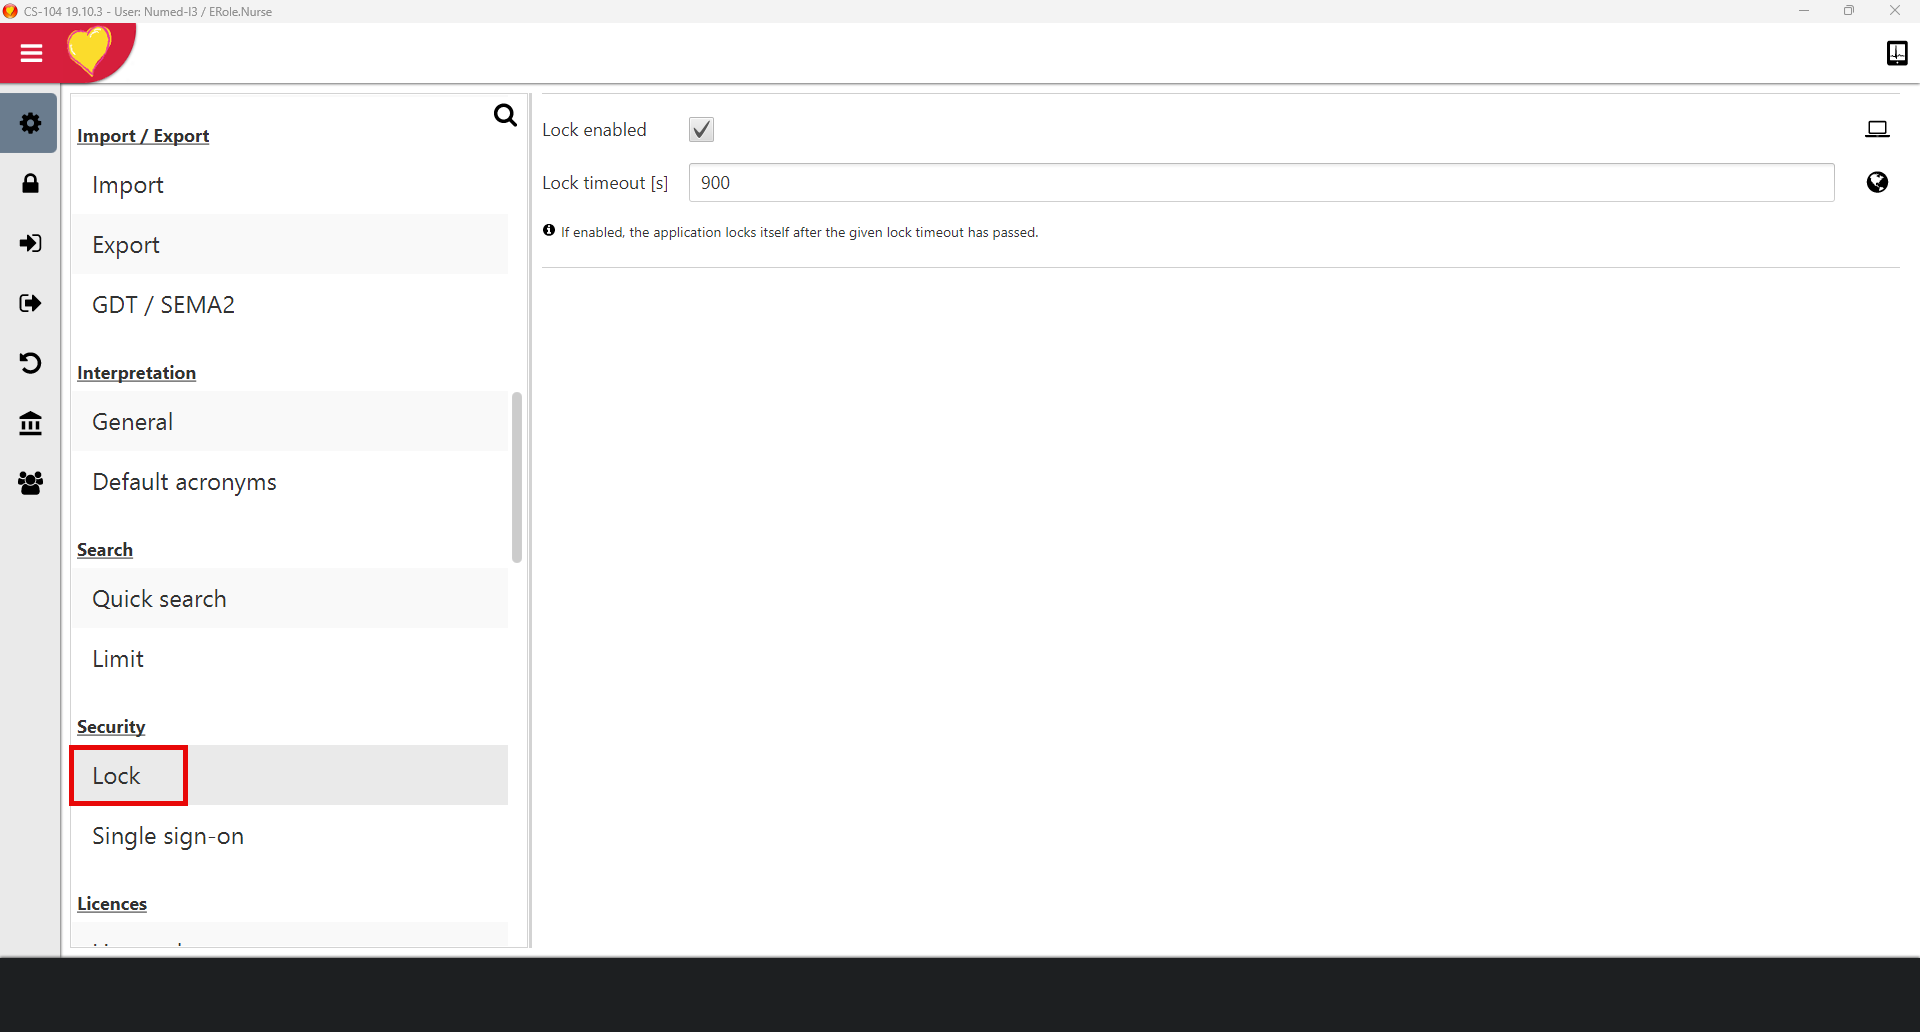
31. Reports – Formats, remember to click
the person symbol after each amendment
a. Resting ECG 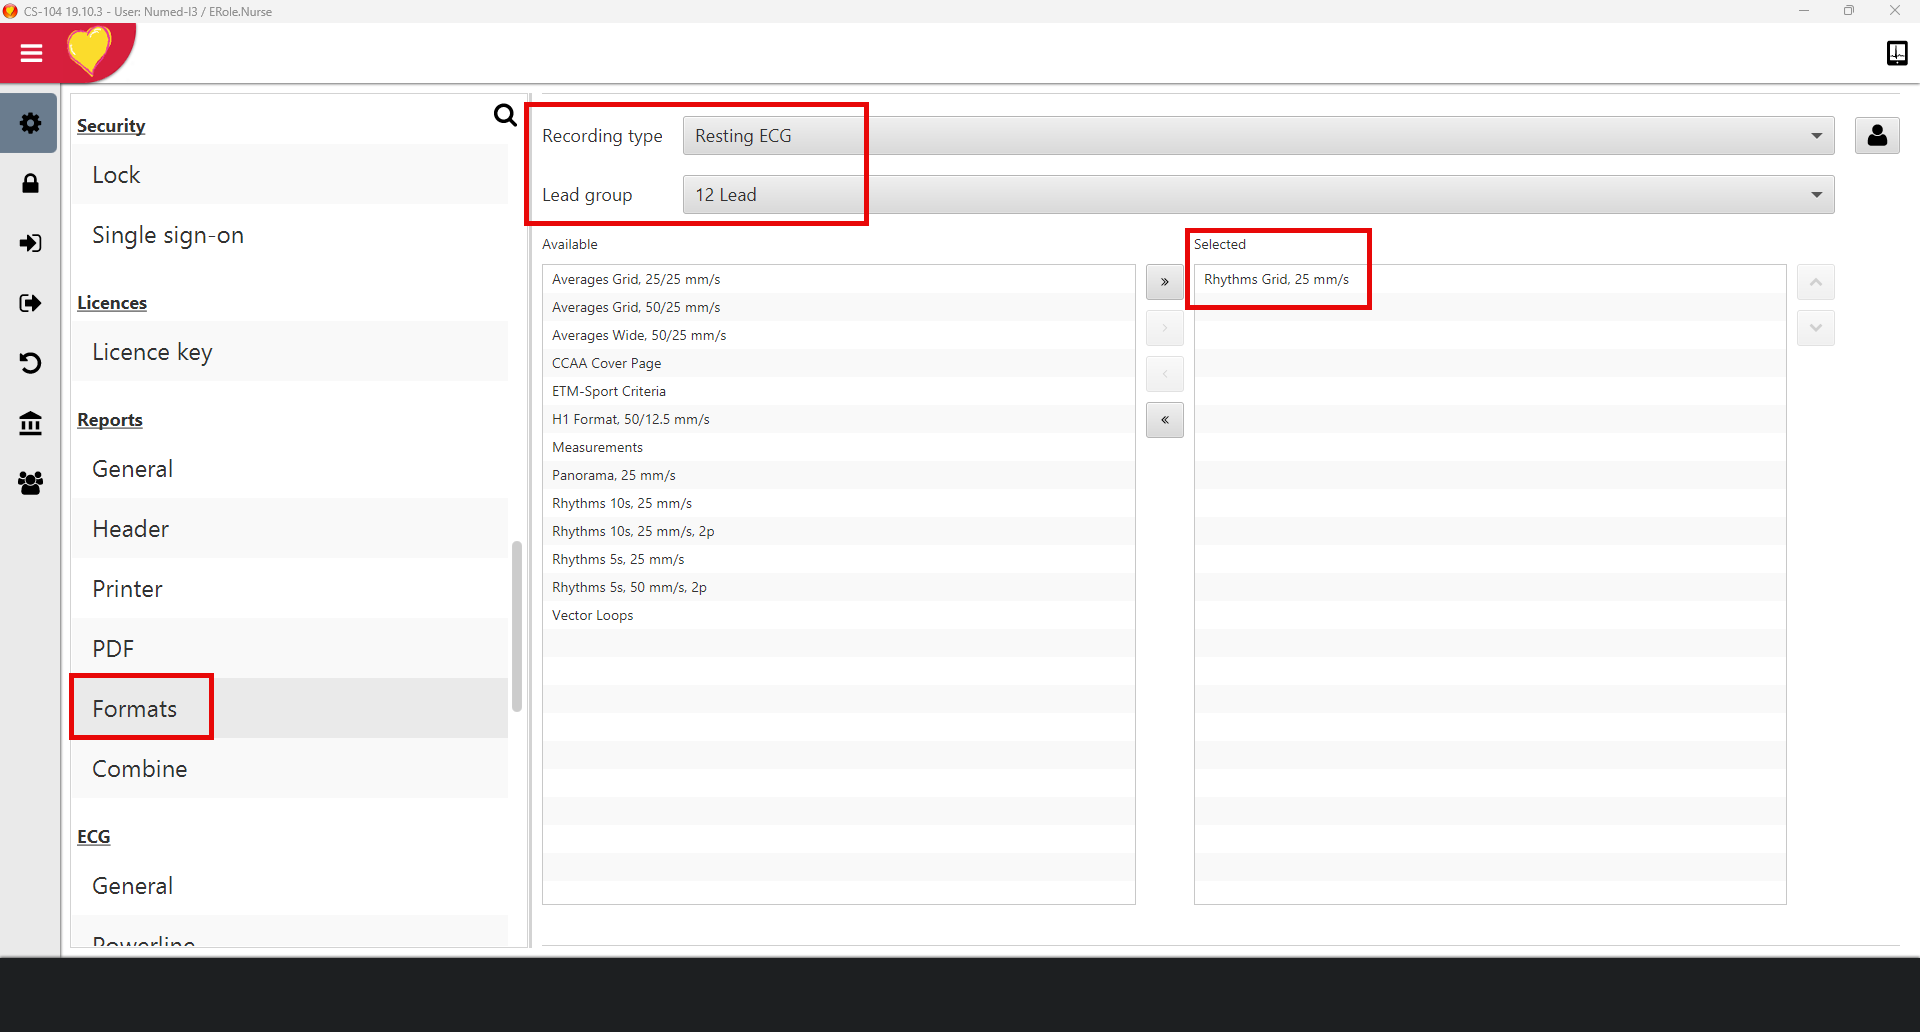
b. Resting rhythm 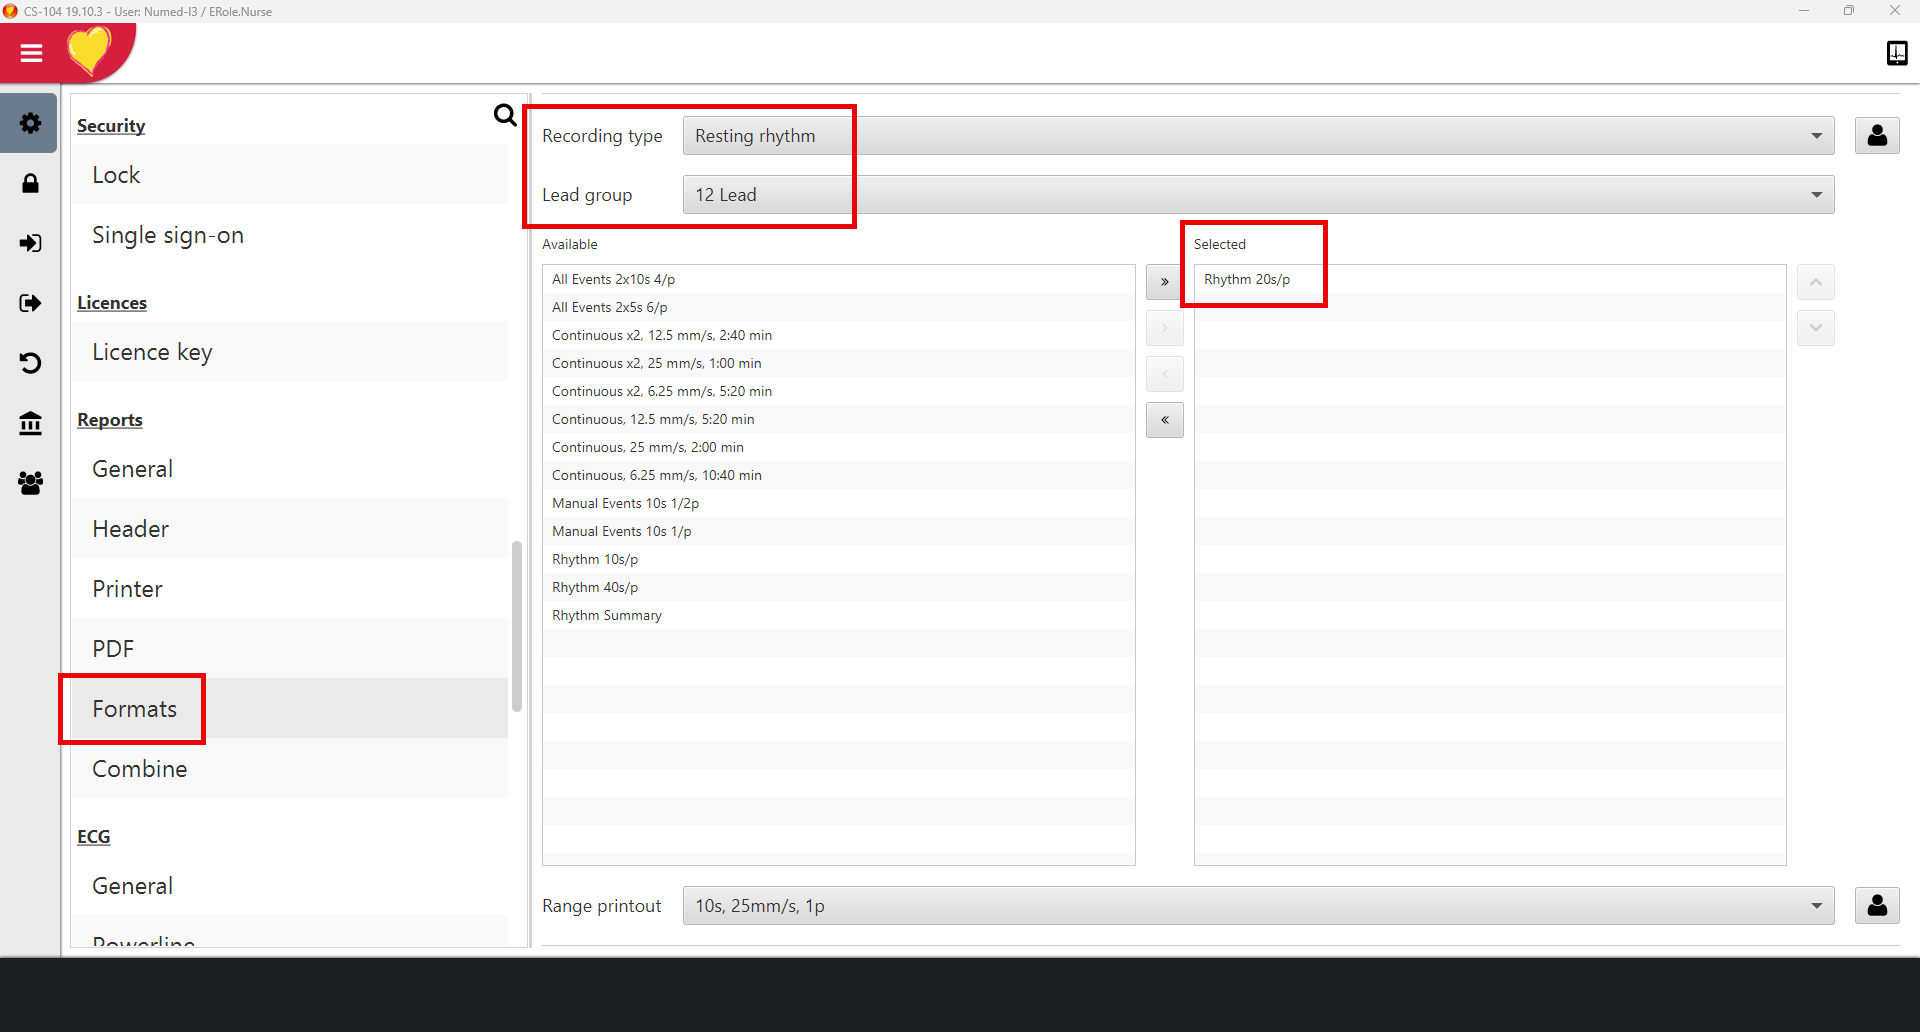
32. ECG - General 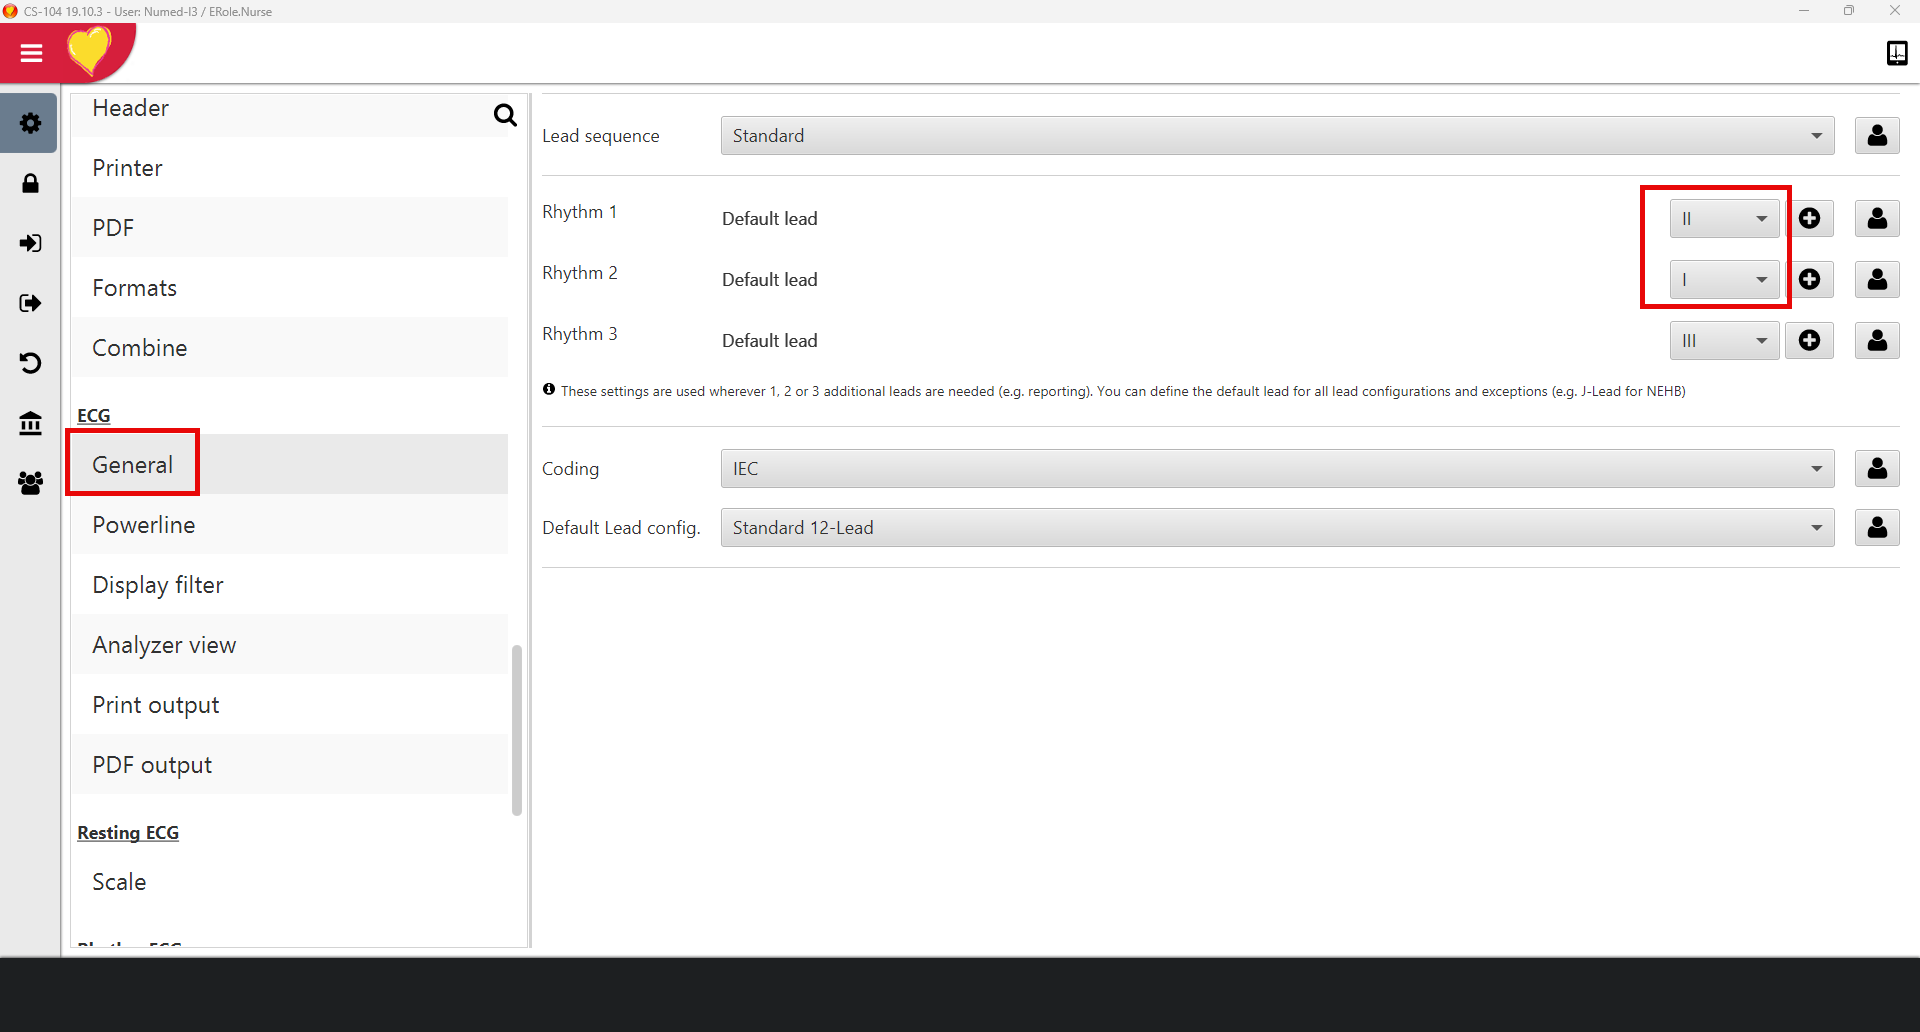
33. ECG – Analyzer view 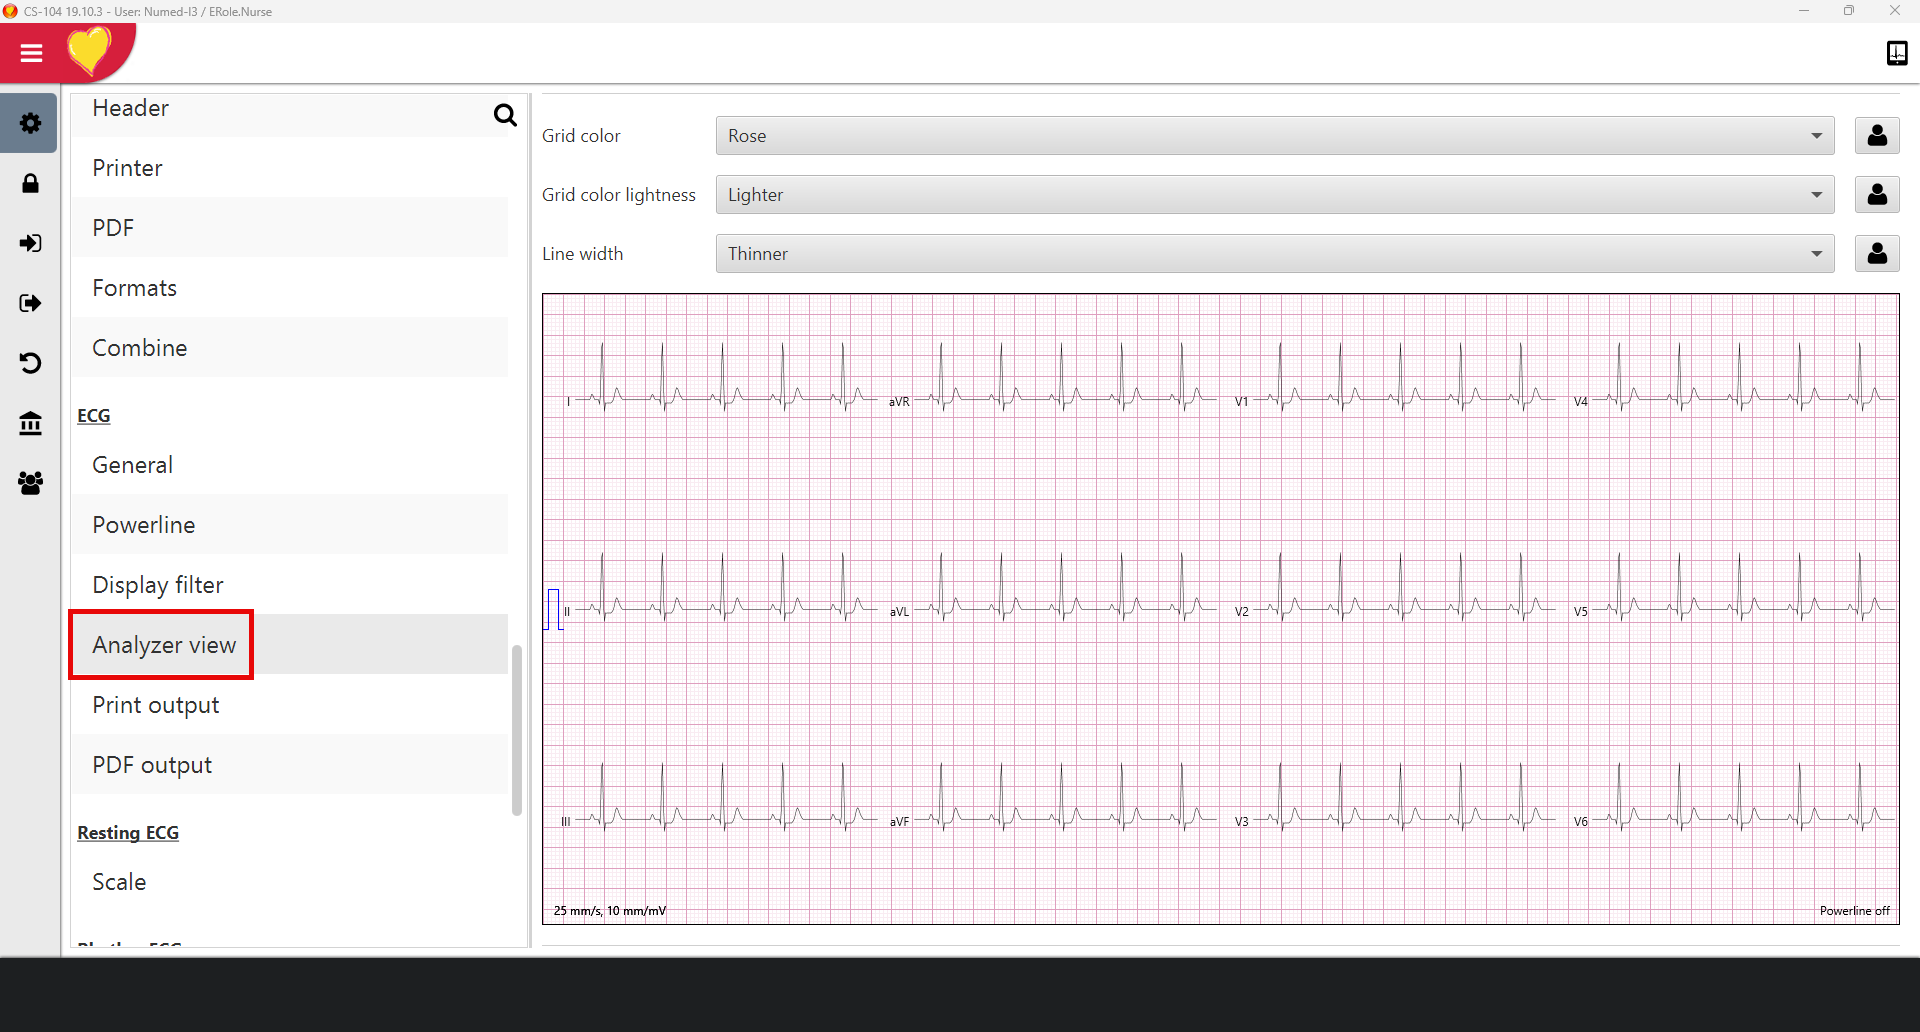
34. ECG – Print output 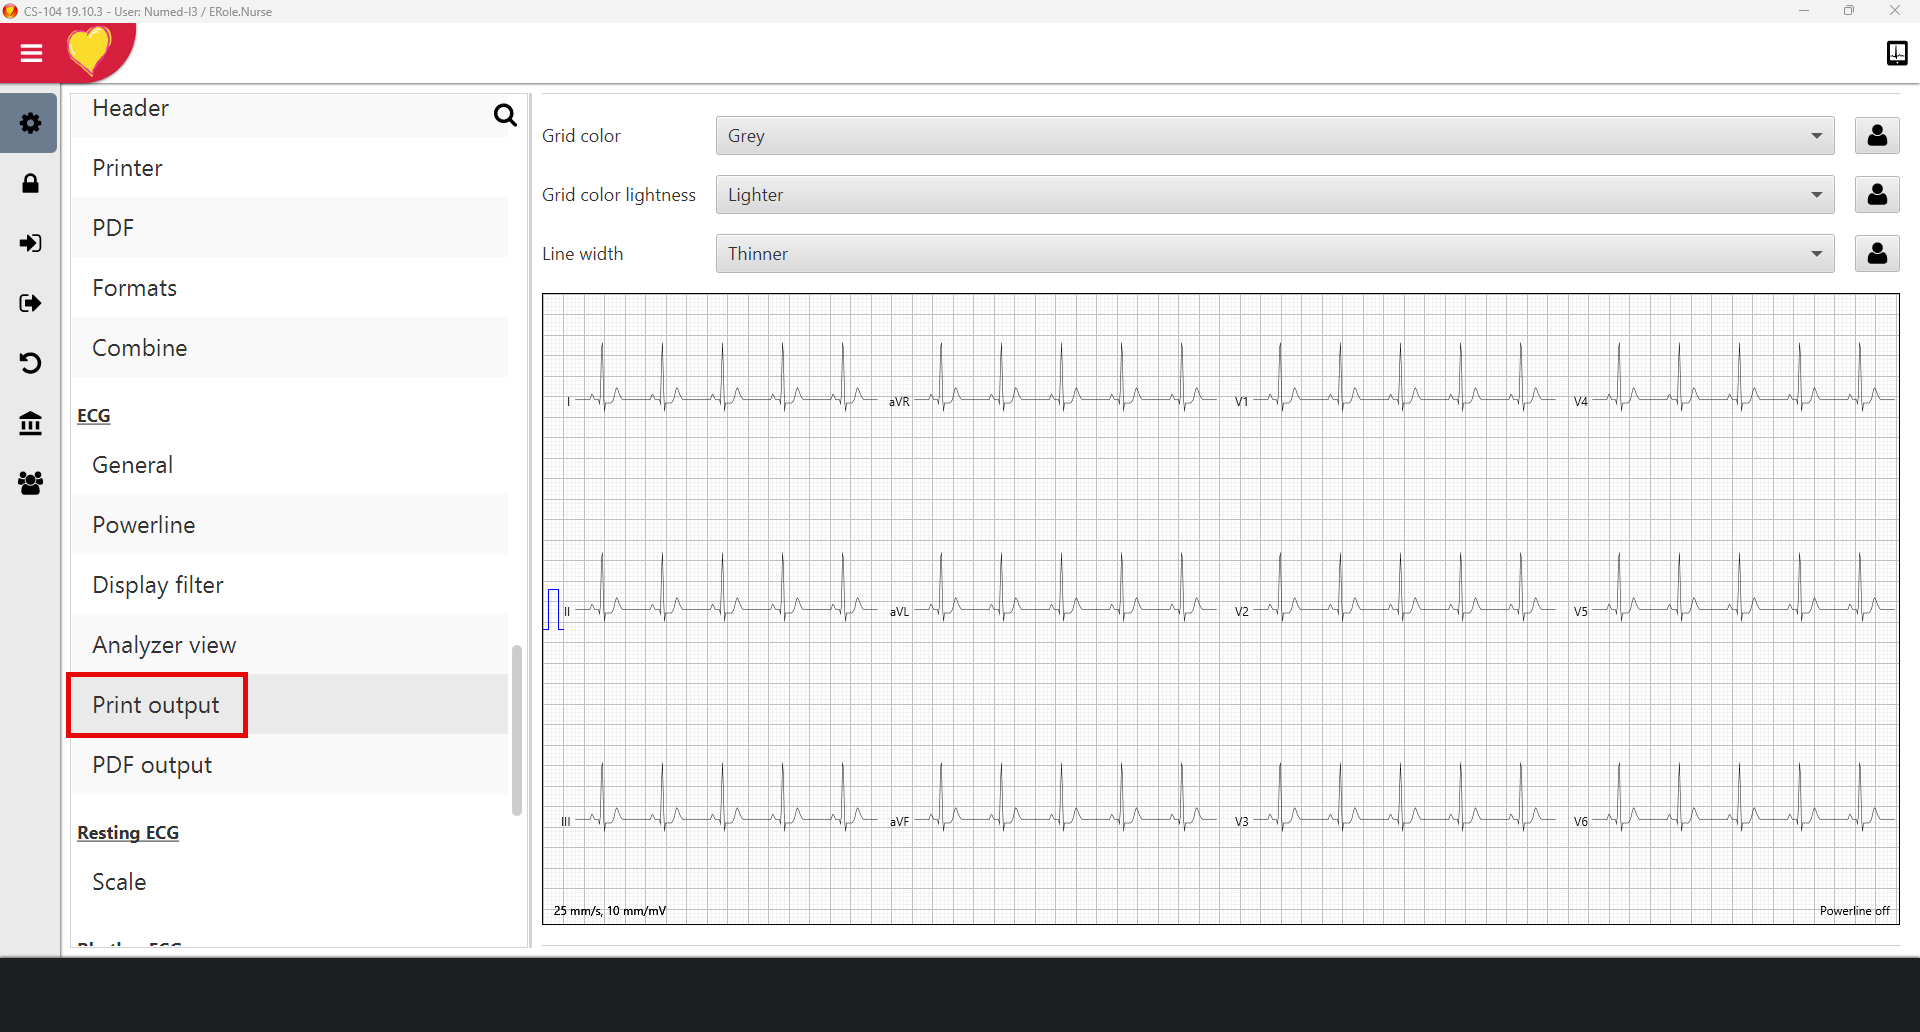
35. ECG - PDF output 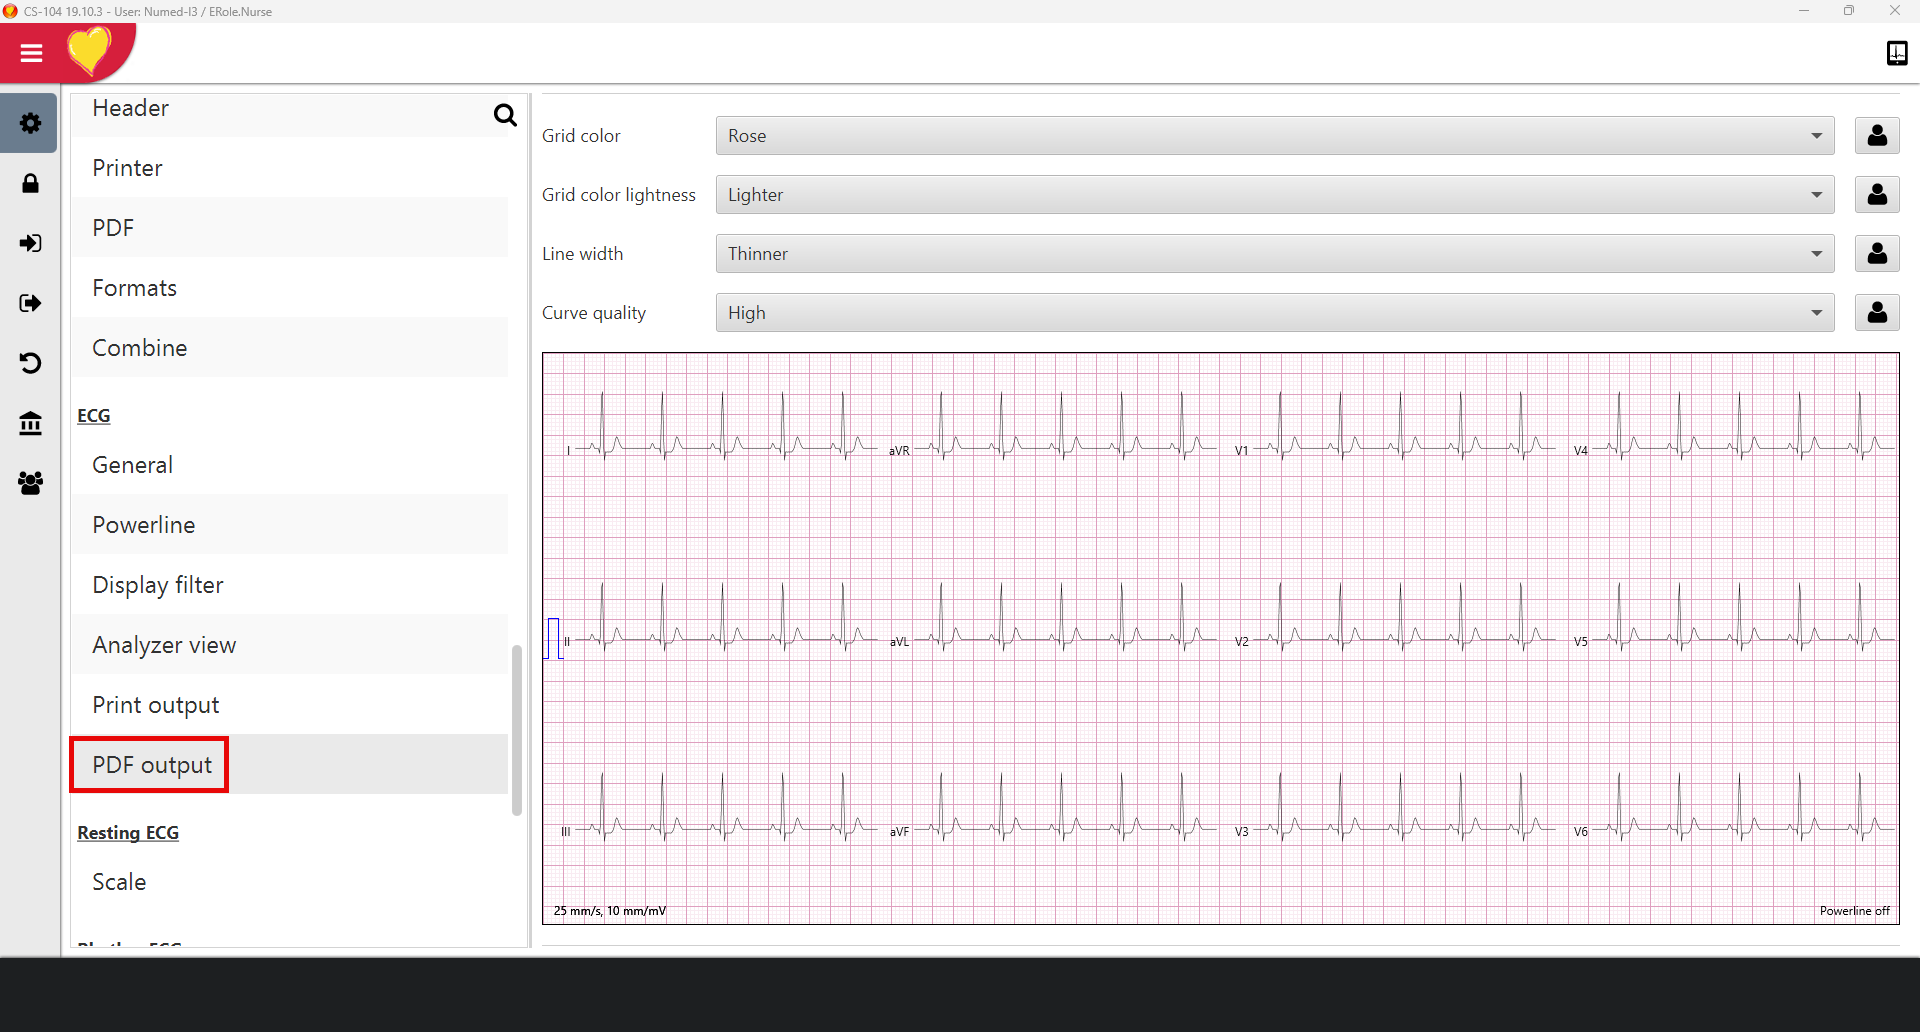
36. Close the software down.
37. Relaunch CS-104 and login again with
the Numed-I3 user
38. Click Patient search 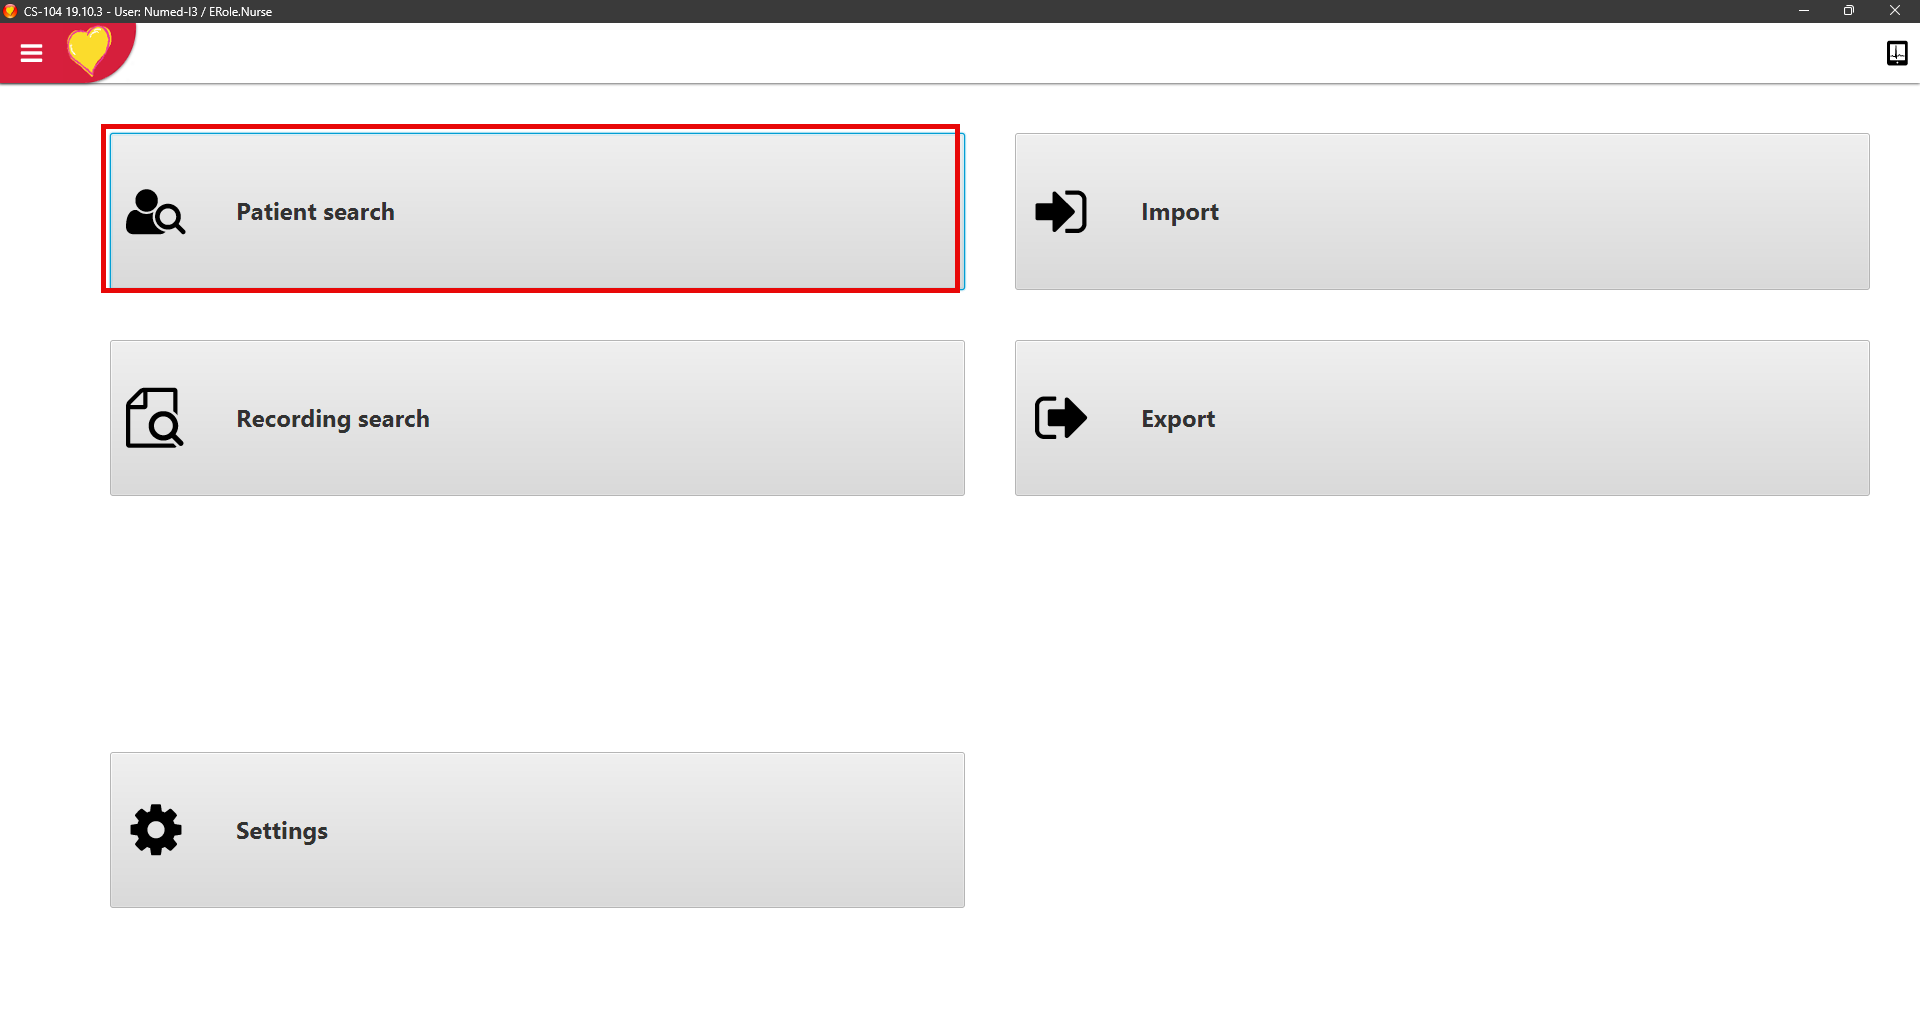
39. Click Add New Patient 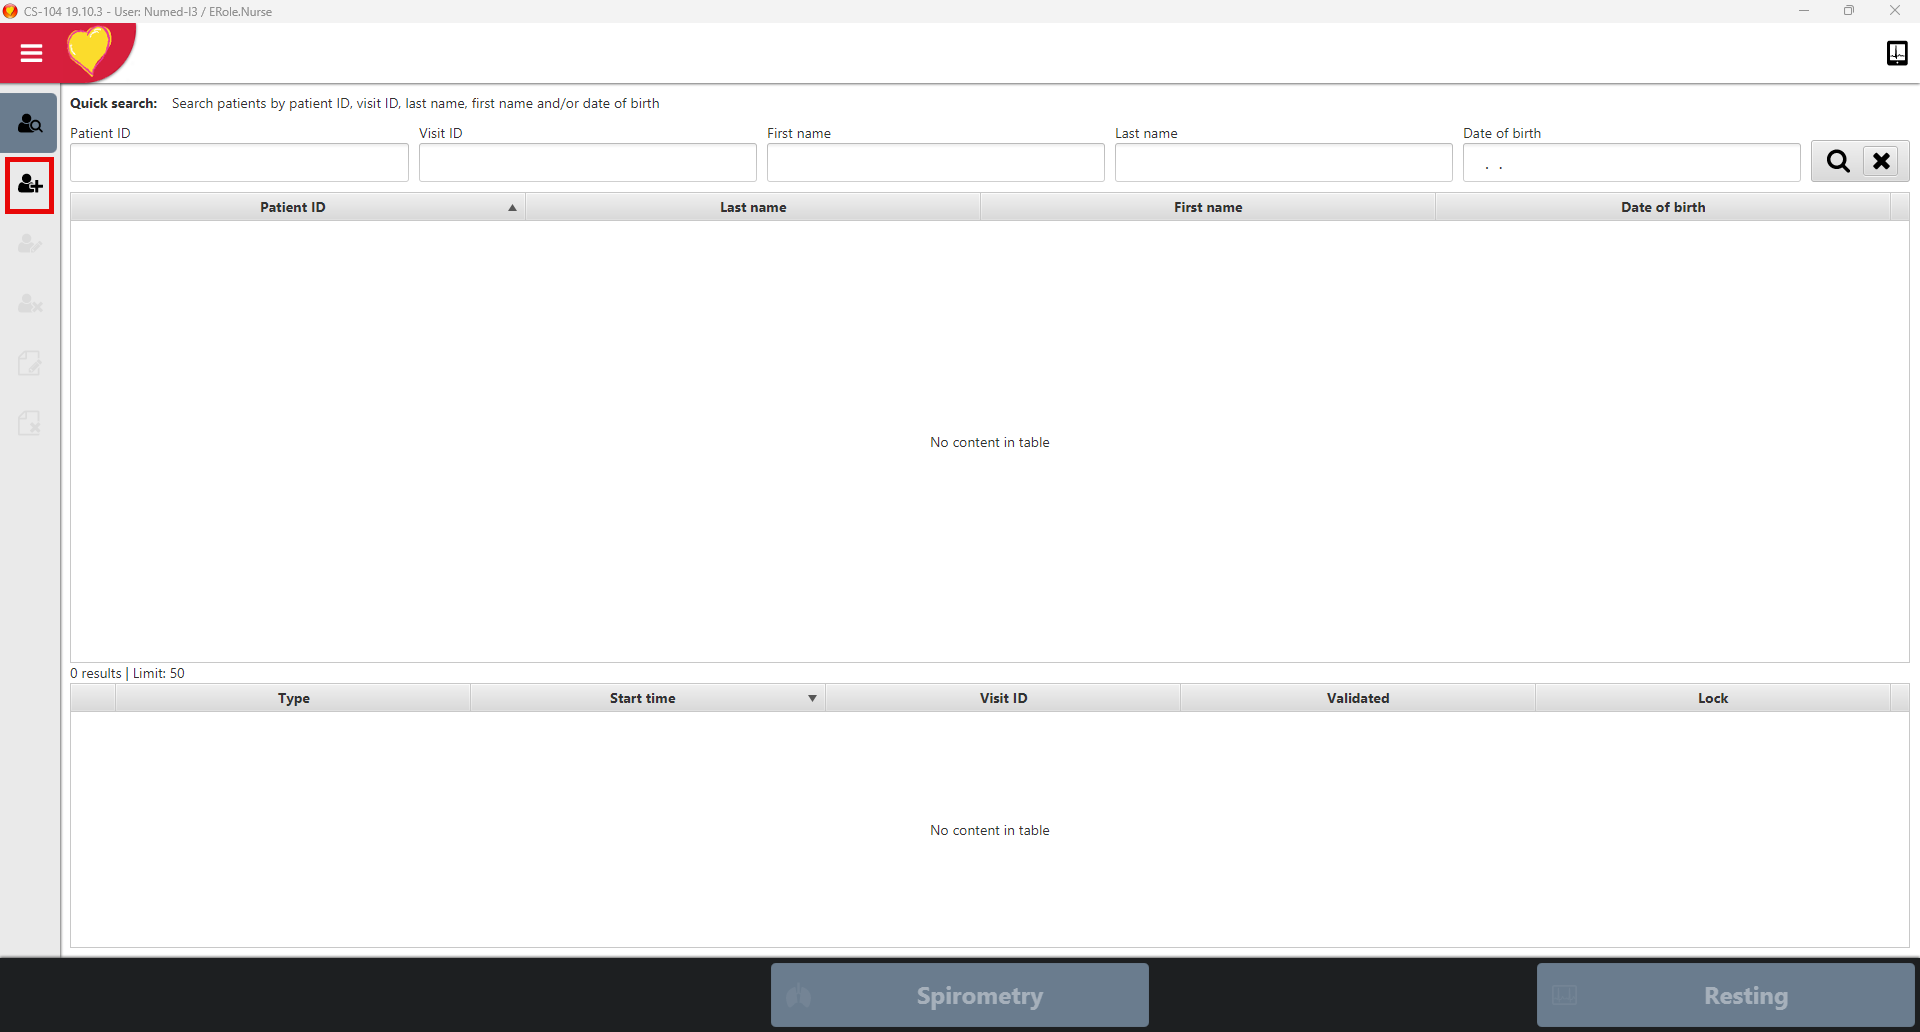
40. Create a dummy patient and then click
Save patient 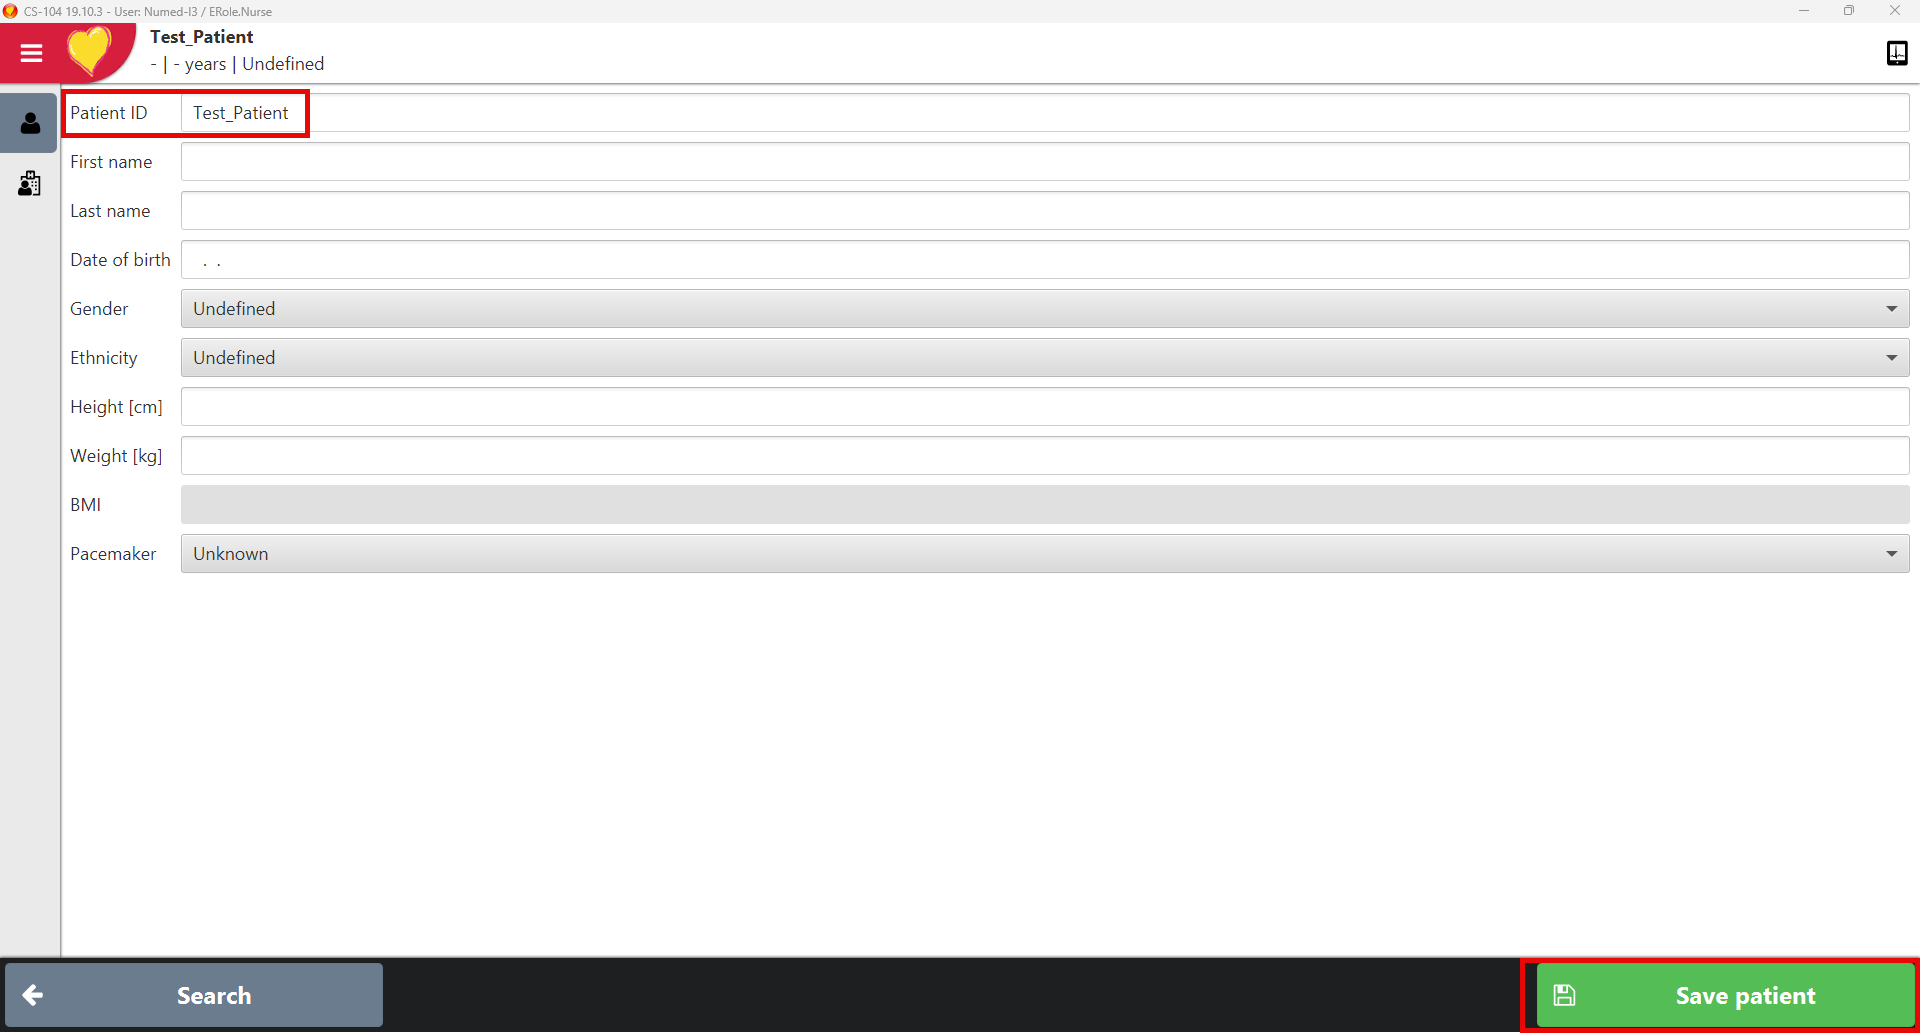
41. Click Resting 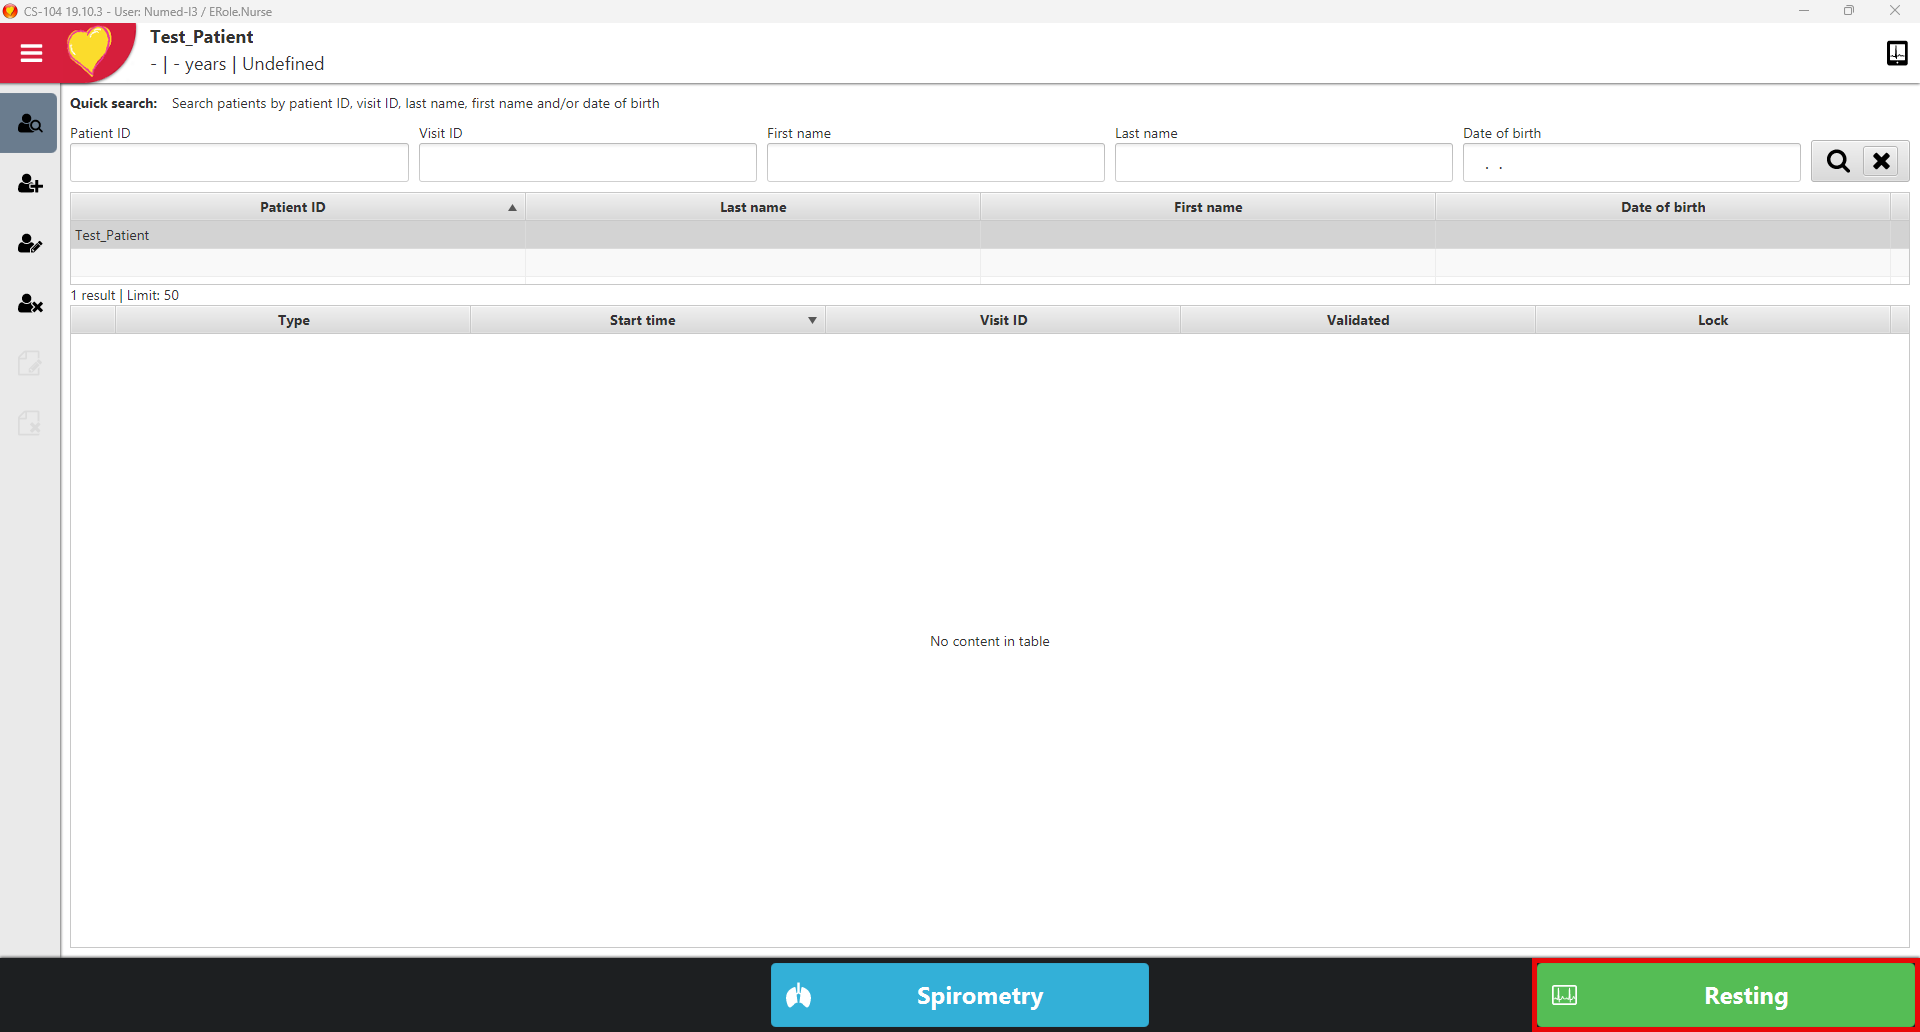
42. Once the acquisition screen appears, click the yellow heart menu at the top left-hand corner
43. At the bottom left hand corner click Edit
actions
43. Configure as below - choose the tab depending on if you've plugged the machine in our not.
Settings with machine plugged in
Settings without machine plugged in
Settings with machine plugged in
Settings without machine plugged in
45. Then click the yellow heart menu
46. Click Save actions
47. Close down CS-104
Configuring Intelligent Integration Interface
48. Launch the Intelligent Integration
Interface (I3) and click the settings cog in the top right-hand corner
49. Configure correctly for the Clinical
System
TPP SystmOne
EMIS Web
Please note that the EMIS
Web Server is set for England in this example, please ensure that you select
the correct one for the region. The Organisation ID is the EMIS number (may be
known as CDB number)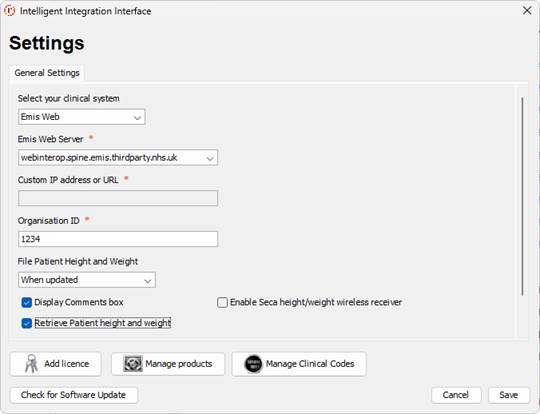
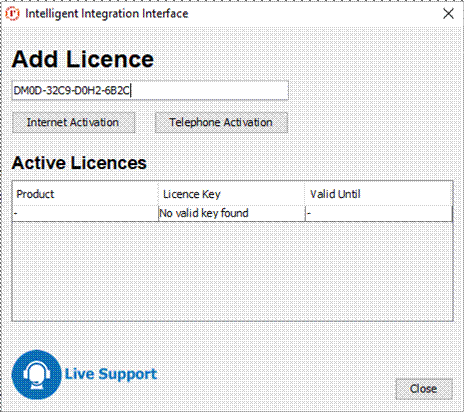
50. Click Add license
51. Enter the supplied I3 license key from
Numed in the box and click Internet Activation, once added click Close – please
note that the license key in the image is a dummy and will not work
52. Click Manage products
53. Ensure that Schiller CS-104 is
ticked and remove any non-required products and then click Save
54. Click ECG Settings tab and scroll down to Schiller
CS-104 settings. Once configured click Save. Please note that the username and password are the
same ones we configured for CS-104.
Your
software is now fully configured and ready for use if at any point you
experience any issues please call Numed support on 0114 399 0010 (option 3) or
use the live chat feature on our website https://www.numed.co.uk/support
For TPP
SystmOne customers please ensure that a user with high-level access runs the
software for the first time to approve the connection to SystmOne
For EMIS
web please ensure that the Intelligent Integration Interface Partner api has
been fully activated in the EMAS manager before the first use